Mule ESB is a lightweight Java-based enterprise service bus (ESB) and integration platform that allows developers to connect applications together quickly and easily, enabling them to exchange data. Mule ESB enables easy integration of existing systems, regardless of the different technologies that the applications use, including JMS, Web Services, JDBC, HTTP, and more.
This example shows how you can transfer or move a file from a source directory to destination directory. We simply put a file in a source directory and Mule will move the file to the destination directory. Using Mule ESB it’s very easy to move the file from one location to another location. If we had to move the file using manual coding then we had to write many lines of code and we could have moved the file to the destination. But using Mule ESB we just simple create two file endpoints and tell the source and destination path and Mule does the rest of the thing. You can put any kind of file to the source for transferring to the destination.
Related Posts:
Prerequisites
Mule Studio
JDK 1.6
Maven 3
Knowledge of XML
Step 1. Open Mule Studio and create a mule project. Go to File->New->Mule Project. Now enter the Project Name, select Runtime – Mule Server 3.4.x, check the check box Create POM file for project and maintain with Maven. Now enter the following information
Group Id: your company(ex. example.com) name – com.example
Artifact Id: project name – mule_proj
Version: Mule studio generates default
Step 2. Click Next and verify project Location and JRE are correctly set. Click Finish.
Step 3. Now create a new flow or you can also use the existing default flow. To create a new flow, do right-click on flows. Go to New->Mule Flow. Now enter information as below
Name: file_transfer
File name: as you type the file name gets generated ending with .mflow
Description: Transfer a file from source directory to destination directory
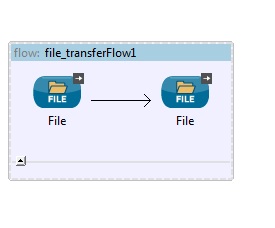
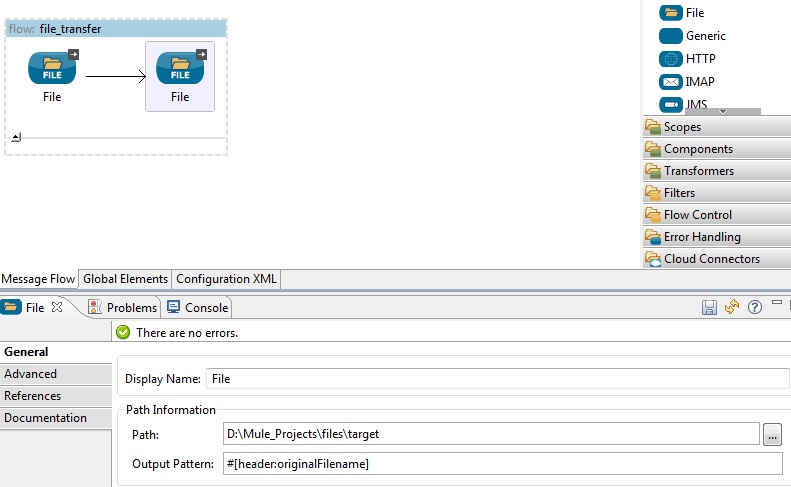
Step 4. Now open the file_transfer flow by double clicking and drag and drop two file endpoints onto the flow file as shown in the below picture.
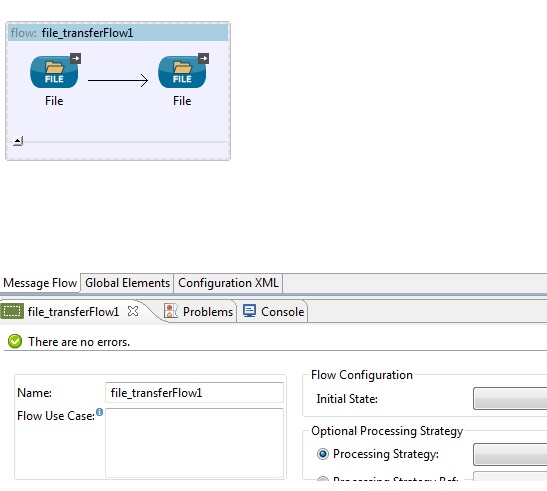
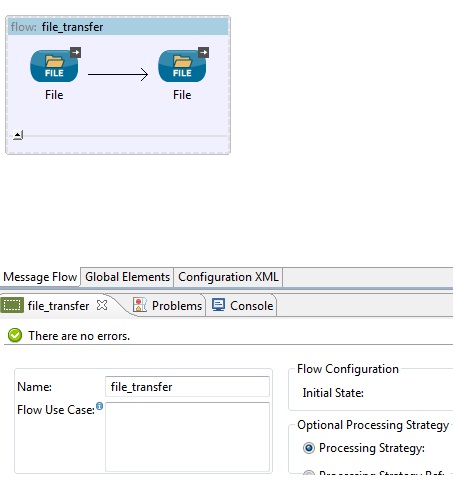
Step 5. Rename the file_tranferFlow1 to file_transfer as shown below in the picture.
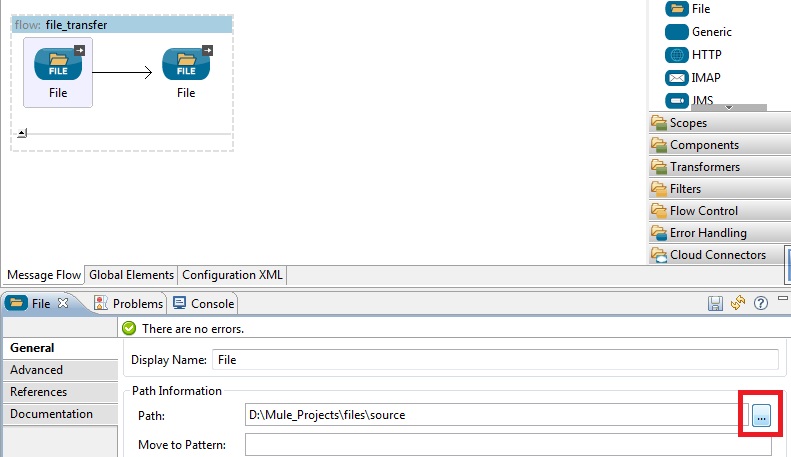
Step 6. Click on File inbound Endpoint and select the source path using the browse button. Keep Polling Frequency and File Age as they are. Polling Frequency means that Mule will poll every specified time period(in milliseconds) to the source directory and if it gets any file there it will simply move the file to the destination location. File Age means Maximum age for a file to be processed. This is useful for a large file. So the file gets written to the destination location before the file is processed by Mule. Mule immediately deletes the file from its source directory once the file gets transferred or read. If you want to keep the file in the source directory then you have to write the below code before <flow name=”file_transfer” …/>
<file:connector name="fileConnector" autoDelete="false" />
Step 7. Now click on File outbound Endpoint and select the destination path where the file will be moved to. Put #[header:originalFilename] for Output Pattern. This #[header:originalFilename] tells the original file name will be used for destination file while saving to the destination path.
So entire XML as shown below
<?xml version="1.0" encoding="UTF-8"?>
<mule xmlns:file="http://www.mulesoft.org/schema/mule/file" xmlns="http://www.mulesoft.org/schema/mule/core"
    xmlns:doc="http://www.mulesoft.org/schema/mule/documentation"
    xmlns:spring="http://www.springframework.org/schema/beans" version="CE-3.4.0"
    xmlns:xsi="http://www.w3.org/2001/XMLSchema-instance"
    xsi:schemaLocation="http://www.springframework.org/schema/beans http://www.springframework.org/schema/beans/spring-beans-current.xsd
http://www.mulesoft.org/schema/mule/core http://www.mulesoft.org/schema/mule/core/current/mule.xsd
http://www.mulesoft.org/schema/mule/file http://www.mulesoft.org/schema/mule/file/current/mule-file.xsd">
    <flow name="file_transfer" doc:name="file_transfer">
        <file:inbound-endpoint path="D:\Mule_Projects\files\source"
            responseTimeout="10000" doc:name="File" />
        <file:outbound-endpoint path="D:\Mule_Projects\files\target"
            outputPattern="#[header:originalFilename]" responseTimeout="10000"
            doc:name="File" />
    </flow>
</mule>
If you want you can also directly copy and paste the above code to the file_transfer.mflow file. You can either use visual editor to drag and drop the individual component for generating the source code or you can also directory write the XML code for the application.
Step 8. Run the mule flow file_transfer.mflow. Do right-click on file_transfer.mflow and go to Run As->Mule Application. If you have already out the file in source directory you will see that the destination directory has got the file. So you will get output something like below
**********************************************************************
* Application: mule_proj                                             *
* OS encoding: Cp1252, Mule encoding: UTF-8                          *
*                                                                    *
* Agents Running:                                                    *
*   JMX Agent                                                        *
**********************************************************************
INFO  2014-08-30 08:40:24,018 [main] org.mule.module.launcher.MuleDeploymentService:
++++++++++++++++++++++++++++++++++++++++++++++++++++++++++++
+ Started app 'mule_proj'                                  +
++++++++++++++++++++++++++++++++++++++++++++++++++++++++++++
INFO  2014-08-30 08:40:24,987 [[mule_proj].connector.file.mule.default.receiver.01] org.mule.transport.file.FileMessageReceiver: Lock obtained on file: D:\Mule_Projects\files\source\Tags_webtuts.txt
INFO  2014-08-30 08:40:25,045 [[mule_proj].connector.file.mule.default.dispatcher.01] org.mule.lifecycle.AbstractLifecycleManager: Initialising: 'connector.file.mule.default.dispatcher.6200698'. Object is: FileMessageDispatcher
INFO  2014-08-30 08:40:25,045 [[mule_proj].connector.file.mule.default.dispatcher.01] org.mule.lifecycle.AbstractLifecycleManager: Starting: 'connector.file.mule.default.dispatcher.6200698'. Object is: FileMessageDispatcher
INFO  2014-08-30 08:40:25,049 [[mule_proj].connector.file.mule.default.dispatcher.01] org.mule.transport.file.FileConnector: Writing file to: D:\Mule_Projects\files\target\Tags_webtuts.txt
Look very carefully how it happens after Started app ‘mule_proj’, you will understand. First it obtains the lock on file, then initializes the file object to be transfer and writes the file object to the destination.
Thanks for your reading . Please do not forget to leave a comment.
Nice article, interesting to read…
Thanks for sharing the useful information