Introduction
In this post we will create Angular + Spring Boot MongoDB CRUD Example. In my previous tutorial on Spring Boot MongoDB CRUD Example, we did not have any UI or front-end, so we had to test out application using REST client but here we will use Angular on front-end side so that we can easily make this application as a full-stack and deliver to the end users for performing real time activities.
Prerequisites
Spring Boot MongoDB CRUD Example
Angular 7
Now we will see how to implement Angular + Spring Boot MongoDB CRUD Example.
Setting up Angular Project
Please make sure you go through the tutorial how to create new Angular project on Windows.
Create a project called angular-spring-boot-mongodb in your desired directory by executing the following command in cmd window:
ng new angular-spring-boot-mongodbOnce your project downloads the necessary libraries, make sure your newly created project compiles and opens in browser successfully. To check this navigate to the directory angular-spring-boot-mongodb and execute the following command:
ng serve --openNow stop the server and create the required modules for CRUD (Create, Read, Update and Delete) operations. We will perform CRUD operations on user management.
To know more about Angular style guide, check it here.
Execute below commands one by one when you are onto angular-spring-boot-mongodb directory in cmd window:
ng g c user-list --routing=true
ng g c user-add --routing=true
ng g c user-edit --routing=true
ng g c user-detail --routing=true
The above commands will create required directory structures under src/app folder.
If you open src/app/app.module.ts file, you will see entries for all new modules are also added to this file.
Creating routing
You need to create routes for navigating through your application. For example, you want to create new user, so you will click on a link – New User. You may update existing user, so you may click on Edit link and so on.
Edit file src/app/app-routing.module.ts to have below source code.
We are importing required modules and components and at the end we exported the class for using into different components.
We have defined paths for routing, such as, when you hit the root URL in the browser, it will redirect to the /user path, or when we want to perform operations – create, update, delete or fetch detail for a particular user.
import { NgModule } from '@angular/core';
import { Routes, RouterModule } from '@angular/router';
import { UserListComponent } from './user-list/user-list.component';
import { UserAddComponent } from './user-add/user-add.component';
import { UserEditComponent } from './user-edit/user-edit.component';
import { UserDetailComponent } from './user-detail/user-detail.component';
const routes: Routes = [
  { path: '', redirectTo: '/user', pathMatch: 'full' },
  { path: 'user', component: UserListComponent },
  { path: 'detail/:id', component: UserDetailComponent },
  { path: 'edit/:id', component: UserEditComponent },
  { path: 'add', component: UserAddComponent }
];
@NgModule({
  imports: [RouterModule.forRoot(routes)],
  exports: [RouterModule]
})
export class AppRoutingModule { }
Adding additional modules
Open your src/app/app.module.ts and add few required modules for the application, such as, FormsModule, HttpClientModule and AppRoutingModule. Other components and modules are added automatically into this file.
Make sure you have the same source code as below:
import { BrowserModule } from '@angular/platform-browser';
import { NgModule } from '@angular/core';
import { FormsModule }    from '@angular/forms';
import { HttpClientModule }    from '@angular/common/http';
import { AppRoutingModule } from './app-routing.module';
import { AppComponent } from './app.component';
import { UserListComponent } from './user-list/user-list.component';
import { UserAddComponent } from './user-add/user-add.component';
import { UserEditComponent } from './user-edit/user-edit.component';
import { UserDetailComponent } from './user-detail/user-detail.component';
@NgModule({
  declarations: [
    AppComponent,
    UserListComponent,
    UserAddComponent,
    UserEditComponent,
    UserDetailComponent
  ],
  imports: [
    BrowserModule,
    AppRoutingModule,
	FormsModule,
	HttpClientModule
  ],
  providers: [],
  bootstrap: [AppComponent]
})
export class AppModule { }
Removing Content from App Component
If you now open your application by executing command ng serve –open in cmd window you won’t redirect to the http://localhost:4200/user though we have redirected to the home path /user in src/app/app-routing.module.ts file.
You will see the path in browser as http://localhost:4200/user but you will also see the output on the browser from src/app/app.component.html file.
Therefore, remove everything from app.component.html file and put only <router-outlet></router-outlet> in this file and now save the file.
Now if you open the application by executing command ng serve --open, then you should see the output as “user-list works!” on home page.
Creating model class
We will perform CRUD operations on user information, so we need to have user model class. Create src/app/user.ts file with below source code:
export class User {
  id?: string;
  name: string;
  email: string;
  pwd: string;
}
Here in the above class, notice I have put ? after id field to indicate optional value for id field during adding new user information.
Why we have write id field as id, because we directly want to map MongoDB id field with our model class.
Creating service class
We need a central class that will be used by all modules in Angular to interact with server either to fetch the data or send the data to server when required for Angular + Python Flask REST API MongoDB CRUD Exmple.
Create below service class – src/app/user.service.ts – that will list down CRUD operation methods.
In the below class we have defined methods for CRUD operations for users.
So we give user options through our UI to add new user, update existing user, fetching exiting users/user and deleting existing user.
Also notice that I have mentioned responseType: 'text' as 'json'. By default, the response type is json and we don’t need to mention response type but, in our server side code produces text response and this response type is not handled by Angular. Therefore, we need to convert to json response to avoid incompatibility issues.
import { Injectable } from '@angular/core';
import { HttpClient, HttpHeaders } from '@angular/common/http';
import { Observable, of } from 'rxjs';
import { catchError, map, tap } from 'rxjs/operators';
import { User } from './user';
const httpOptions = {
  headers: new HttpHeaders({ 'Content-Type': 'application/json' })
};
@Injectable({ providedIn: 'root' })
export class UserService {
  private userUrl = 'http://localhost:8080';  // URL to REST API
  constructor(private http: HttpClient) { }
  /** GET users from the server */
  getUsers(): Observable<User[]> {
    return this.http.get<User[]>(this.userUrl + '/user');
  }
  /** GET user by id. Will 404 if id not found */
  getUser(id: string): Observable<any> {
    const url = `${this.userUrl}/user/${id}`;
    return this.http.get<User>(url);
  }
  /** POST: add a new user to the server */
  addUser(user: User) {
	//console.log(user);
    return this.http.post(this.userUrl + '/user', user, {headers: new HttpHeaders({ 'Content-Type': 'application/json' }), responseType: 'text' as 'json'});
  }
  /** PUT: update the user on the server */
  updateUser(user: User): Observable<any> {
    return this.http.put(this.userUrl + '/user', user, {headers: new HttpHeaders({ 'Content-Type': 'application/json' }), responseType: 'text' as 'json'});
  }
  /** DELETE: delete the user from the server */
  deleteUser(user: User) {
	  if (confirm("Are you sure to delete?")) {
		const url = `${this.userUrl}/user`;
		console.log(user);
		const options = {
		  headers: new HttpHeaders({
			'Content-Type': 'application/json',
		  }),
			body: user,
		  responseType: 'text' as 'json'
		};
		return this.http.delete(url, options);
	  }
	  return of({});
  }
}
Retrieving Users
First we will see how we can fetch all users information from server.
So modify the file src/app/user-list/user-list.component.ts to perform required operations.
ngonInit() hook initializes the directive/component after Angular first displays the data-bound properties and sets the directive/component’s input properties.
We fetch all users data using getUsers() method and populate the users[] array to display data on the HTML page.
We also define delete() method to delete a particular user from a list of users shown on HTML page.
import { Component, OnInit } from '@angular/core';
import { ActivatedRoute } from '@angular/router';
import { User } from '../user';
import { UserService } from '../user.service';
@Component({
  selector: 'app-user-list',
  templateUrl: './user-list.component.html',
  styleUrls: ['./user-list.component.css']
})
export class UserListComponent implements OnInit {
	users: User[] = [];
	constructor(private route: ActivatedRoute, private userService: UserService) { }
	ngOnInit() {
		this.getUsers();
	}
	getUsers(): void {
		this.userService.getUsers().subscribe(users => this.users = users);
	}
	delete(user: User): void {
		this.userService.deleteUser(user).subscribe(success=> {this.getUsers();});
	}
}
Now edit src/app/user-list/user-list.component.html file to show users information on page.
Here we are showing users information on HTML table and we have attached Detail, Edit and Delete operations for each row of the table.
We are not showing id value on the page as it does not have a good human readable format. But we are retrieving id value and putting with Edit and Detail links.
<h3>Users</h3>
<div>
	<a routerLink="/add">
		Add New User
	</a>
</div>
<table>
  <tr>
    <th>ID</th>
    <th>Name</th>
    <th>Email</th>
	<th>Actions</th>
  </tr>
  <tr *ngFor="let user of users">
    <td>{{user.name}}</td>
    <td>{{user.email}}</td>
	<td>
		<a routerLink="/detail/{{user.id}}">Detail</a>
		<a routerLink="/edit/{{user.id}}">Edit</a>
		<button title="delete user" (click)="delete(user)">x</button>
	</td>
  </tr>
</table>
Retrieving User Detail
Now we will see how to show user detail information when you click on Detail link.
Open src/app/user-detail/user-detail.component.ts file and update the file with below source code.
Here in the below class we fetch the user detail for a given user id as a path parameter. We also provide goBack() function to give user option when he/she wants to go to the previous page.
import { Component, OnInit } from '@angular/core';
import { Location } from '@angular/common';
import { ActivatedRoute } from '@angular/router';
import { User } from '../user';
import { UserService } from '../user.service';
@Component({
  selector: 'app-user-detail',
  templateUrl: './user-detail.component.html',
  styleUrls: ['./user-detail.component.css']
})
export class UserDetailComponent implements OnInit {
	user: User;
	constructor(private route: ActivatedRoute, private userService: UserService, private location: Location) { }
	ngOnInit() {
		this.getUser();
	}
	getUser(): void {
		const id = this.route.snapshot.paramMap.get('id');
		this.userService.getUser(id).subscribe(user => this.user = user);
	}
	goBack(): void {
		this.location.back();
	}
}
Now open src/app/user-detail/user-detail.component.html file to update with below code:
<div *ngIf="user">
  <h2>{{user.name | uppercase}} Details</h2>
  <div>
    <p>
		Name: {{user.name}}
    </p>
	<p>
		Email: {{user.email}}
    </p>
  </div>
  <button (click)="goBack()">go back</button>
</div>
Updating User Detail
We will see how to update an existing user by clicking on the Edit link on the page.
Now we will implement functionality for updating existing user.
Open the file src/app/user-edit/user-edit.component.ts and update as below.
We fetch the user details first and these values will be used to populate the input fields on HTML form so that user can understand what was the previous value for a field.
import { Component, OnInit, Input } from '@angular/core';
import { Location } from '@angular/common';
import { ActivatedRoute } from '@angular/router';
import { User } from '../user';
import { UserService } from '../user.service';
@Component({
  selector: 'app-user-edit',
  templateUrl: './user-edit.component.html',
  styleUrls: ['./user-edit.component.css']
})
export class UserEditComponent implements OnInit {
	@Input() user: User;
	constructor(private route: ActivatedRoute, private userService: UserService, private location: Location) { }
	ngOnInit() {
		this.getUser();
	}
	getUser(): void {
		const id = this.route.snapshot.paramMap.get('id');
		this.userService.getUser(id).subscribe(user => this.user = user);
	}
	save(): void {
		this.userService.updateUser(this.user).subscribe(success=> {this.goBack();});
	}
	goBack(): void {
		this.location.back();
	}
}
Now open src/app/user-edit/user-edit.component.html file to update as below.
<div *ngIf="user">
  <h2>{{user.name | uppercase}} Details</h2>
  <div>
    <p>
		Name: <input [(ngModel)]="user.name" placeholder="User Name">
    </p>
	<p>
		Email: <input [(ngModel)]="user.email" placeholder="User Email">
    </p>
  </div>
  <button (click)="goBack()">go back</button>
  <button (click)="save()">save</button>
</div>
Add User Detail
Next we will implement functionality for adding new user information. Open the file src/app/user-add/user-add.component.ts and update with below code.
import { Component, OnInit, Input } from '@angular/core';
import { Location } from '@angular/common';
import { User } from '../user';
import { UserService } from '../user.service';
@Component({
  selector: 'app-user-add',
  templateUrl: './user-add.component.html',
  styleUrls: ['./user-add.component.css']
})
export class UserAddComponent implements OnInit {
	@Input() user: User = { name: '', email: '', pwd: '' };
	constructor(private userService: UserService, private location: Location) { }
	ngOnInit() {
	}
	save(): void {
		this.userService.addUser(this.user).subscribe(() => this.goBack());
	}
	goBack(): void {
		this.location.back();
	}
}
Update the file src/app/user-add/user-add.component.html as below.
<div>
  <h2>Add User Detail</h2>
  <div>
    <p>
		<label>Name:
			<input [(ngModel)]="user.name" placeholder="User Name"/>
		</label>
    </p>
	<p>
		<label>Email:
			<input [(ngModel)]="user.email" placeholder="User Email"/>
		</label>
    </p>
	<p>
		<label>Password:
			<input type="password" [(ngModel)]="user.pwd" placeholder="User Password"/>
		</label>
    </p>
  </div>
  <button (click)="goBack()">go back</button>
  <button (click)="save()">save</button>
</div>
Delete User Details
Now if you click on the X link to delete a user. You will get confirmation alert and you need to click Yes for deletion.
Testing the Application
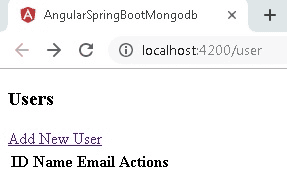
User List
Initially you will find no user information on the home page.
Add User
Add new user by clicking on Add New User link.
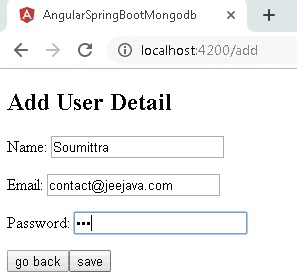
After adding new user you will be redirected to the /user page and now you will see new user information.
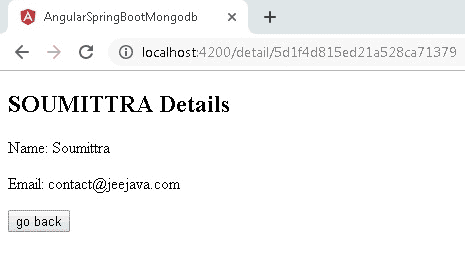
User Detail
When you click on Detail link then you will find below page with user details.
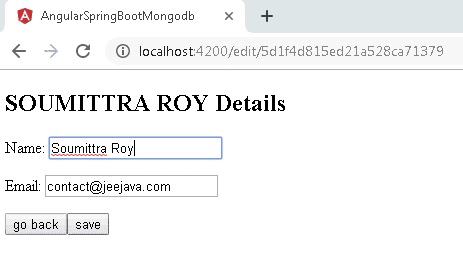
Update User
Click on the Edit link and update user information as shown below. You will be redirected to the /userpage after successful update.
Also notice when you update name you will see the name above the Name label gets updated as you type in the Name input field.
Delete User
Delete user by clicking on X link, you will get a confirmation alert box whether you want to delete or not. Click Yes to delete and No to cancel deletion.

That’s all. Hope you got idea on Angular + Spring Boot MongoDB CRUD Example.
Source Code
Thanks for reading.