Introduction
This tutorial shows an example on how MVC (Model, View, Controller) works in Spring framework. In this tutorial you will also find how JDBC (Java Database Connectivity API) works with Spring MVC. We will also see how annotation like @Autowired works in Spring. You will also see how datasource is configured in Spring. This example shows how to read the database configurations from properties file.
The example which we are going to see is about to display a list of items from MySQL database and add a new item to the database. We will use both maven and gradle build tools to build our application.
Related Posts:
- Spring MVC and JDBC CRUD Example
- Spring MVC and JDBC CRUD with zero XML
- Spring Boot MVC and JDBC CRUD Example
Prerequisites
Eclipse 2019-12, Java at least 8, Gradle 6.4.1, Maven 3.6.3, Spring 5.2.6, MySQL 8.0.17, Servlet 4.0.1, Tomcat 9.0.24
Project Setup
Now we will setup a gradle based project in Eclipse. The name of the project is spring-mvc-and-spring-jdbc.
The default generated build.gradle script does not include the required libraries.
Notice in the below build script we have put plugin id war as we are going to create war file from the application.
So we will update the build script as follows:
plugins {
	id 'war'
    id 'java-library'
}

repositories {
    jcenter()
}

dependencies {
    implementation 'org.springframework:spring-web:5.2.6.RELEASE'
    implementation 'org.springframework:spring-webmvc:5.2.6.RELEASE'
    implementation 'org.springframework:spring-jdbc:5.2.6.RELEASE'
    implementation 'mysql:mysql-connector-java:8.0.17'
    implementation 'javax.servlet:javax.servlet-api:4.0.1'
    implementation 'javax.servlet:jstl:1.2'
    implementation 'javax.xml.bind:jaxb-api:2.4.0-b180830.0359'
}
For maven based web project use below pom.xml file:
<?xml version="1.0" encoding="UTF-8"?>

<project xmlns="http://maven.apache.org/POM/4.0.0"
	xmlns:xsi="http://www.w3.org/2001/XMLSchema-instance"
	xsi:schemaLocation="http://maven.apache.org/POM/4.0.0 http://maven.apache.org/xsd/maven-4.0.0.xsd">
	<modelVersion>4.0.0</modelVersion>

	<groupId>com.roytuts</groupId>
	<artifactId>spring-mvc-and-spring-jdbc</artifactId>
	<version>0.0.1-SNAPSHOT</version>
	<packaging>war</packaging>

	<properties>
		<project.build.sourceEncoding>UTF-8</project.build.sourceEncoding>
		<java.version>12</java.version>
		<failOnMissingWebXml>false</failOnMissingWebXml>
	</properties>

	<dependencies>
		<dependency>
			<groupId>org.springframework</groupId>
			<artifactId>spring-webmvc</artifactId>
			<version>5.2.6.RELEASE</version>
		</dependency>

		<dependency>
			<groupId>org.springframework</groupId>
			<artifactId>spring-web</artifactId>
			<version>5.2.6.RELEASE</version>
		</dependency>

		<dependency>
			<groupId>org.springframework</groupId>
			<artifactId>spring-jdbc</artifactId>
			<version>5.2.6.RELEASE</version>
		</dependency>

		<!-- Servlet -->
		<dependency>
			<groupId>javax.servlet</groupId>
			<artifactId>javax.servlet-api</artifactId>
			<version>4.0.1</version>
			<scope>provided</scope>
		</dependency>

		<dependency>
			<groupId>javax.servlet</groupId>
			<artifactId>jstl</artifactId>
			<version>1.2</version>
		</dependency>

		<dependency>
			<groupId>mysql</groupId>
			<artifactId>mysql-connector-java</artifactId>
			<version>8.0.17</version>
		</dependency>

		<!--required only if jdk 9 or higher version is used -->
		<dependency>
			<groupId>javax.xml.bind</groupId>
			<artifactId>jaxb-api</artifactId>
			<version>2.4.0-b180830.0359</version>
		</dependency>
	</dependencies>

	<build>
		<finalName>spring-mvc-and-spring-jdbc-maven</finalName>
		<plugins>
			<plugin>
				<groupId>org.apache.maven.plugins</groupId>
				<artifactId>maven-compiler-plugin</artifactId>
				<version>3.8.1</version>
				<configuration>
					<source>${java.version}</source>
					<target>${java.version}</target>
				</configuration>
			</plugin>
		</plugins>
	</build>
</project>
MySQL Table
We will create a table called items into MySQL database server under roytuts database.
CREATE TABLE `items` (
  `item_id` int unsigned NOT NULL AUTO_INCREMENT,
  `item_name` varchar(45) COLLATE utf8mb4_unicode_ci NOT NULL,
  `item_price` double NOT NULL,
  PRIMARY KEY (`item_id`)
) ENGINE=InnoDB AUTO_INCREMENT=6 DEFAULT CHARSET=utf8mb4 COLLATE=utf8mb4_unicode_ci;
Database Properties
We are going to put database details in a properties file called jdbc.properties under src/main/resources classpath folder.
jdbc.driverClassName=com.mysql.cj.jdbc.Driver
jdbc.url=jdbc:mysql://localhost:3306/roytuts
jdbc.username=root
jdbc.password=root
Database and MVC Configuration
The below class is a configuration class for ViewResolver and JdbcTemplate and methods are annotated with @Bean because they will be automatically resolved as Spring beans.
If we do not give any name to @Bean then it will automatically name the bean with the same return type with first letter in lower case.
For examples, bean name for public ViewResolver getViewResolver() will be viewResolver and public JdbcTemplate getJdbcTemplate() will be jdbcTemplate.
We have annotated with @EnableWebMvc because this class is used in Spring web MVC.
We have an annotation @ComponentScan for base package com.roytuts.spring.mvc.and.spring.jdbc because we want to let Spring find the annotated classes with @Controller, @Repository, @Service etc.
We have also retrieved the datasource properties using @PropertySource annotation.
package com.roytuts.spring.mvc.and.spring.jdbc.config;

import org.springframework.beans.factory.annotation.Autowired;
import org.springframework.context.annotation.Bean;
import org.springframework.context.annotation.ComponentScan;
import org.springframework.context.annotation.Configuration;
import org.springframework.context.annotation.PropertySource;
import org.springframework.core.env.Environment;
import org.springframework.jdbc.core.JdbcTemplate;
import org.springframework.jdbc.datasource.DriverManagerDataSource;
import org.springframework.web.servlet.config.annotation.EnableWebMvc;
import org.springframework.web.servlet.config.annotation.ResourceHandlerRegistry;
import org.springframework.web.servlet.config.annotation.ViewResolverRegistry;
import org.springframework.web.servlet.config.annotation.WebMvcConfigurer;
import org.springframework.web.servlet.view.InternalResourceViewResolver;
import org.springframework.web.servlet.view.JstlView;

@Configuration
@EnableWebMvc
@PropertySource("classpath:jdbc.properties")
@ComponentScan(basePackages = "com.roytuts.spring.mvc.and.spring.jdbc")
public class WebMvc implements WebMvcConfigurer {

	@Autowired
	private Environment environment;

	@Override
	public void configureViewResolvers(ViewResolverRegistry registry) {
		InternalResourceViewResolver viewResolver = new InternalResourceViewResolver();
		viewResolver.setViewClass(JstlView.class);
		viewResolver.setPrefix("/");
		viewResolver.setSuffix(".jsp");
		registry.viewResolver(viewResolver);
	}

	@Override
	public void addResourceHandlers(ResourceHandlerRegistry registry) {
		registry.addResourceHandler("/assets/**").addResourceLocations("/assets/");
	}

	@Bean
	public JdbcTemplate getJdbcTemplate() throws ClassNotFoundException {
		DriverManagerDataSource dataSource = new DriverManagerDataSource();
		dataSource.setDriverClassName(environment.getRequiredProperty("jdbc.driverClassName"));
		dataSource.setUrl(environment.getRequiredProperty("jdbc.url"));
		dataSource.setUsername(environment.getRequiredProperty("jdbc.username"));
		dataSource.setPassword(environment.getRequiredProperty("jdbc.password"));
		JdbcTemplate jdbcTemplate = new JdbcTemplate(dataSource);
		return jdbcTemplate;
	}

}
The below class initializes few things like whatever we defined in the WebMvc along with DispatcherServlet and Servlet mapping when the application starts up.
package com.roytuts.spring.mvc.and.spring.jdbc.config;

import javax.servlet.ServletContext;
import javax.servlet.ServletException;
import javax.servlet.ServletRegistration;

import org.springframework.web.WebApplicationInitializer;
import org.springframework.web.context.support.AnnotationConfigWebApplicationContext;
import org.springframework.web.servlet.DispatcherServlet;

public class WebAppInitializer implements WebApplicationInitializer {

	@Override
	public void onStartup(ServletContext servletContext) throws ServletException {
		AnnotationConfigWebApplicationContext context = new AnnotationConfigWebApplicationContext();
		context.register(WebMvc.class);
		context.setServletContext(servletContext);
		ServletRegistration.Dynamic dispatcher = servletContext.addServlet("DispatcherServlet",
				new DispatcherServlet(context));
		dispatcher.setLoadOnStartup(1);
		dispatcher.addMapping("/");
	}

}
Model and Mapper Classes
Model class represents the Java object into database table and mapper class maps the corresponding table value returned to Java fields. So a particular row in table is represented by a mapper class.
package com.roytuts.spring.mvc.and.spring.jdbc.model;

public class Item {

	private Long itemId;
	private String itemName;
	private Double itemPrice;

	//getters and setters

}
package com.roytuts.spring.mvc.and.spring.jdbc.rowmapper;
import java.sql.ResultSet;
import java.sql.SQLException;
import org.springframework.jdbc.core.RowMapper;
import com.roytuts.spring.mvc.and.spring.jdbc.model.Item;
public class ItemRowMapper implements RowMapper<Item> {
@Override
public Item mapRow(ResultSet rs, int rowNum) throws SQLException {
Item item = new Item();
item.setItemId(rs.getLong(1));
item.setItemName(rs.getString(2));
item.setItemPrice(rs.getDouble(3));
return item;
}
}Repository Class
The repository class performs the database activities.
package com.roytuts.spring.mvc.and.spring.jdbc.dao;

import java.util.ArrayList;
import java.util.List;

import org.springframework.beans.factory.annotation.Autowired;
import org.springframework.jdbc.core.JdbcTemplate;
import org.springframework.stereotype.Repository;

import com.roytuts.spring.mvc.and.spring.jdbc.model.Item;
import com.roytuts.spring.mvc.and.spring.jdbc.rowmapper.ItemRowMapper;

@Repository
public class ItemDao {

	@Autowired
	JdbcTemplate jdbcTemplate;

	public List<Item> getItems() {
		String sql = "SELECT * FROM items";
		List<Item> items = new ArrayList<>();
		items = jdbcTemplate.query(sql, new ItemRowMapper());
		return items;
	}

	public void addItem(Item item) {
		String sql = "INSERT INTO items(item_name,item_price) VALUES (?,?);";
		jdbcTemplate.update(sql, new Object[] { item.getItemName(), item.getItemPrice() });
	}

}
Service Class
Most of the business logic is handled in service layer that interacts with the data access layer and controller layer.
package com.roytuts.spring.mvc.and.spring.jdbc.service;

import java.util.List;

import org.springframework.beans.factory.annotation.Autowired;
import org.springframework.stereotype.Service;

import com.roytuts.spring.mvc.and.spring.jdbc.dao.ItemDao;
import com.roytuts.spring.mvc.and.spring.jdbc.model.Item;

@Service
public class ItemService {

	@Autowired
	ItemDao itemDao;

	public List<Item> getItems() {
		return itemDao.getItems();
	}

	public void addItem(Item item) {
		itemDao.addItem(item);
	}

}
Controller Class
Controller is the entry point that handles request and response from clients.
It defines the required endpoints for handling request and response.
package com.roytuts.spring.mvc.and.spring.jdbc.controller;

import java.util.List;

import org.springframework.beans.factory.annotation.Autowired;
import org.springframework.stereotype.Controller;
import org.springframework.ui.ModelMap;
import org.springframework.web.bind.annotation.GetMapping;
import org.springframework.web.bind.annotation.PostMapping;
import org.springframework.web.bind.annotation.RequestParam;

import com.roytuts.spring.mvc.and.spring.jdbc.model.Item;
import com.roytuts.spring.mvc.and.spring.jdbc.service.ItemService;

@Controller
public class ItemController {

	@Autowired
	ItemService itemService;

	@GetMapping("/")
	public String springMVC(ModelMap modelMap) {
		List<Item> items = itemService.getItems();
		System.out.println("items size: " + items.size());
		modelMap.addAttribute("itemList", items);
		modelMap.addAttribute("msg", "Welcome to Spring MVC and Spring JDBC Example");
		return "items";
	}

	@GetMapping(value = "/addPage")
	public String addPage() {
		return "add";
	}

	@PostMapping(value = "/add")
	public String addItem(@RequestParam("name") String name, @RequestParam("price") String price, ModelMap modelMap) {
		modelMap.addAttribute("name", name);
		modelMap.addAttribute("price", price);
		if (name == null || name.trim().isEmpty()) {
			modelMap.addAttribute("error", "Item Name is required!");
		} else if (price == null || price.trim().isEmpty()) {
			modelMap.addAttribute("error", "Item Price is required!");
		} else {
			Item item = new Item();
			item.setItemName(name);
			item.setItemPrice(Double.valueOf(price));
			itemService.addItem(item);
			modelMap.addAttribute("success", "Item successfully added!");
		}
		return "add";
	}

}
Display Items
We display items when the home page or root page is requested in the browser.
So create items.jsp file under webapp folder.
<%@ page language="java" contentType="text/html; charset=ISO-8859-1"
	pageEncoding="ISO-8859-1"%>
<%@ taglib uri="http://java.sun.com/jsp/jstl/core" prefix="c"%>
<title>Spring MVC and JDBC Example</title>
<p>${msg}</p>
<p>
	<a href="<%=request.getContextPath()%>/addPage">Add
		New Item</a>
</p>
<c:choose>
	<c:when test="${itemList.size() > 0}">
		<h3>List of Items</h3>
		<table>
			<thead>
				<tr>
					<th>ID</th>
					<th>Name</th>
					<th>Price</th>
				</tr>
			</thead>
			<tbody>
				<c:forEach var="item" items="${itemList}">
					<tr>
						<td>${item.itemId}</td>
						<td>${item.itemName}</td>
						<td>${item.itemPrice}</td>
					</tr>
				</c:forEach>
			</tbody>
		</table>
	</c:when>
	<c:otherwise>
        No Item found in the DB!
        </c:otherwise>
</c:choose>
Add Item
When we want to add new item then we need a page for this action.
So create add.jsp file under webapp folder.
<%@ page language="java" contentType="text/html; charset=ISO-8859-1"
        pageEncoding="ISO-8859-1"%>
<%@ taglib uri="http://java.sun.com/jsp/jstl/core" prefix="c"%>
<title>Add new item</title>
<p><a href="<%=request.getContextPath()%>/">Back to
        Item List</a>
</p>
<c:if test="${not empty error}">
    ${error}
</c:if>
<c:if test="${not empty success}">
    ${success}
</c:if>
<h3>Add new item</h3>
<form method="POST" name="login" action="<%=request.getContextPath()%>/add">
    Item Name: <input name="name" value="${name}" type="text" /> <br /><br />
    Item Price: <input name="price" value="${price}" type="text" /><br />
    <input value="Add Item" type="submit" />
</form>
Testing the Application
Once you build the application using the command gradlew clean build from the project’s directory using command line tool, you will get the war file generated under build/libs folder.
Now copy this war file and put this war file under webapps of Tomcat server.
Or if you are using Tomcat server in Eclipse then you can directly deploy the project.
Next run the Tomcat server and your application will be deployed.
Now access the URL http://localhost:8080/spring-mvc-and-spring-jdbc/ in the browser, you will see below page:
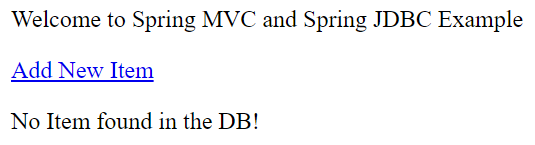
Now insert some data or add new item to see the items on the page.
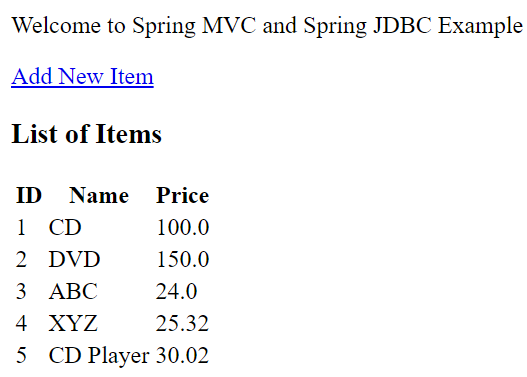
First we will insert some data into table:
insert into `items`(`item_id`,`item_name`,`item_price`) values (1,'CD',100),(2,'DVD',150),(3,'ABC',24),(4,'XYZ',25.32),(5,'CD Player',30.02);Now hit again the same URL, this time you will see a list of items are displayed on the page:
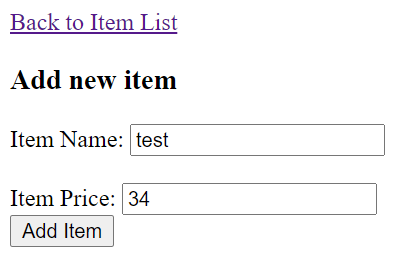
Create a new item as follows by clicking on Add New Item link:
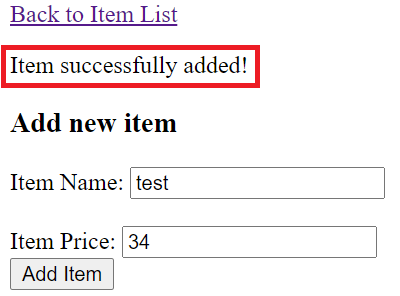
You will see item successfully added:
On the home page you will see the new item:

Source Code
Thanks for reading.
Nice tutorial i found you have explained each points very clearly. Thanks