Introduction
I am going to show you thumbnail creation example in Codeigniter. There is a file upload class in CodeIgniter, which permits you to upload the file or files and also you can create thumbnail for the uploaded file with a desired size. This class also permits you to set various preferences, such as, destination where the file and thumbnail will be uploaded, restriction on file types, restriction on file size, whether a file name should be encrypted or not, maximum length of the file name etc.
Below are the simple few processes for uploading a file and thumbnail creation example in CodeIgniter for this uploaded file.
- A form with input type file is required so that user can select the file using the browse button.
- When the form is submitted, the file is validated to make sure that the file and thumbnail are uploaded against the preferences you set.
- Once the file and thumbnail are uploaded successfully to the specified destination, the success message is shown.
You may also like to read:
Prerequisites
PHP 7.4.3, Codeigniter 3.1.11, Apache HTTP server 2.4
Project Directory
It’s assumed that you have setup Apache, PHP and Codeigniter in Windows system.
Now I will create a project root directory called codeIgniter-thumbnail-creation under the Apache server’s htdocs folder.
Now move all the directories and files from CodeIgniter framework into codeIgniter-thumbnail-creation directory.
I may not mention the project root directory in subsequent sections and I will assume that I am talking with respect to the project’s root directory.
Auto-load Configuration
Go to application/config/auotload.php and change the value as shown below. You do not want to load every time the repeatedly used helper functions, so it is always good idea to load those things once in order to use them uniformly throughout the application.
$autoload['helper'] = array('url', 'file', 'form');View File
You need to create a file called file_upload.php under application/views folder.
In the below form I have used CodeIgniter’s form helper function. Also notice when you need to upload a file or files, you have to use the enctype="multipart/form-data" and hence we have used form_open_multipart().
If there is no need to upload a file then you can use only form_open(). You have passed some attributes in form_open_multipart(), which will be added in the html’s form tag.
You have also some other variables like $errors, $success which will show errors and success messages respectively. I have CodeIgniter’s built-in validation_errors() function which will show also error messages.
<?php
defined('BASEPATH') OR exit('No direct script access allowed');
?><!DOCTYPE html>
<html lang="en">
<head>
	<meta charset="utf-8">
	<title>CodeIgniter Thumbnail Creation</title>

	<style type="text/css">

	::selection { background-color: #E13300; color: white; }
	::-moz-selection { background-color: #E13300; color: white; }

	body {
		background-color: #fff;
		margin: 40px;
		font: 13px/20px normal Helvetica, Arial, sans-serif;
		color: #4F5155;
	}

	a {
		color: #003399;
		background-color: transparent;
		font-weight: normal;
	}

	h1 {
		color: #444;
		background-color: transparent;
		border-bottom: 1px solid #D0D0D0;
		font-size: 19px;
		font-weight: normal;
		margin: 0 0 14px 0;
		padding: 14px 15px 10px 15px;
	}

	code {
		font-family: Consolas, Monaco, Courier New, Courier, monospace;
		font-size: 12px;
		background-color: #f9f9f9;
		border: 1px solid #D0D0D0;
		color: #002166;
		display: block;
		margin: 14px 0 14px 0;
		padding: 12px 10px 12px 10px;
	}

	#body {
		margin: 0 15px 0 15px;
	}

	p.footer {
		text-align: right;
		font-size: 11px;
		border-top: 1px solid #D0D0D0;
		line-height: 32px;
		padding: 0 10px 0 10px;
		margin: 20px 0 0 0;
	}

	#container {
		margin: 10px auto;
		padding: 10px;
		width:500px;
		border: 1px solid #D0D0D0;
		box-shadow: 0 0 8px #D0D0D0;
	}
	</style>
</head>
<body>

<div id="container">
	<h1>CodeIgniter Thumbnail Creation</h1>

	<p>Select a file to create thumbnail</p>
	<?php
		if (isset($success) && strlen($success)) {
			echo '<div class="success">';
			echo '<p>' . $success . '</p>';
			echo '</div>';
		}
		if (isset($errors) && strlen($errors)) {
			echo '<div class="error">';
			echo '<p>' . $errors . '</p>';
			echo '</div>';
		}
		if (validation_errors()) {
			echo validation_errors('<div class="error">', '</div>');
		}
    ?>
	<div>
	<?php
		$attributes = array('name' => 'file_upload_form', 'id' => 'file_upload_form');
		echo form_open_multipart($this->uri->uri_string(), $attributes);
	?>
		<p><input name="file_name" id="file_name" readonly="readonly" type="file" /></p>
		<p><input name="file_upload" value="Create Thumbnail" type="submit" /></p>
	<?php
        echo form_close();
    ?>
	</div>
</div>

</body>
</html>
Controller Class
Create a file called Thumbnail.php under application/controllers folder.
This controller is responsible for uploading the selected file and creating thumbnail from the uploaded file.
In the below controller class we have loaded the required library to validate form.
I am handling error and success message through separate functions. I have defined separate destination folders for uploading file and thumbnail. I have set required configurations for file and thumbnail. I am performing validations on file to check whether file was really uploaded or not.
<?php
defined('BASEPATH') OR exit('No direct script access allowed');

class Thumbnail extends CI_Controller {

	//variable for storing error message
    private $error;

    //variable for storing success message
    private $success;

    function __construct() {
        parent::__construct();
        //load this to validate the inputs in upload form
        $this->load->library('form_validation');
    }

    //appends all error messages
    private function handle_error($err) {
        $this->error .= nl2br($err . "\r\n");
    }

    //appends all success messages
    private function handle_success($succ) {
        $this->success .= nl2br($succ . "\r\n");
    }

    //file upload action
    public function index() {
        //check whether submit button was clicked or not
        if ($this->input->post('file_upload')) {
            //set preferences

            //file upload destination
            $config['upload_path'] = './upload/';
            //allowed file types. * means all types
            $config['allowed_types'] = 'gif|jpg|png';
            //allowed max file size. 0 means unlimited file size
            $config['max_size'] = '0';
            //max file name size
            $config['max_filename'] = '255';
            //whether file name should be encrypted or not
            $config['encrypt_name'] = TRUE;

            //thumbnail path
            $thumb_path = './upload/thumb/';
            //store file info once uploaded
            $file_data = array();
            //check for errors
            $is_file_error = FALSE;
            //check if file was selected for upload
            if (!$_FILES) {
                $is_file_error = TRUE;
                $this->handle_error('Select at least one file.');
            }
            //if file was selected then proceed to upload
            if (!$is_file_error) {
                //load the preferences
                $this->load->library('upload', $config);
                //check file successfully uploaded. 'file_name' is the name of the input
                if (!$this->upload->do_upload('file_name')) {
                    //if file upload failed then catch the errors
                    $this->handle_error($this->upload->display_errors());
                    $is_file_error = TRUE;
                } else {
                    //store the file info
                    $file_data = $this->upload->data();
                    if (!is_file($thumb_path . $file_data['file_name'])) {
                        $config = array(
                            'source_image' => $file_data['full_path'], //get original image
                            'new_image' => $thumb_path,
                            'maintain_ratio' => true,
                            'width' => 150,
                            'height' => 100
                        );
                        $this->load->library('image_lib', $config); //load library
                        $this->image_lib->resize(); //do whatever specified in config
                    }
                }
            }
            // There were errors, we have to delete the uploaded files
            if ($is_file_error) {
                if ($file_data) {
                    $file = './upload/' . $file_data['file_name'];
                    if (file_exists($file)) {
                        unlink($file);
                    }
                    $thumb = $thumb_path . $file_data['file_name'];
                    if ($thumb) {
                        unlink($thumb);
                    }
                }
            } else {
                $this->handle_success('File was successfully uploaded and thumbnail created.');
            }
        }

        //load the error and success messages
        $data['errors'] = $this->error;
        $data['success'] = $this->success;
        //load the view along with data
        $this->load->view('file_upload', $data);
    }
}
/* End of file Thumbnail.php */
/* Location: ./application/controllers/Thumbnail.php */
Route Configuration
You need to override the default controller name in application/config/routs.php file with your controller class.
$route['default_controller'] = 'thumbnail';Make sure upload and upload/thumb folders exist under project root directory.
Testing the Application
Make sure your Apache server is started and your application deployed.
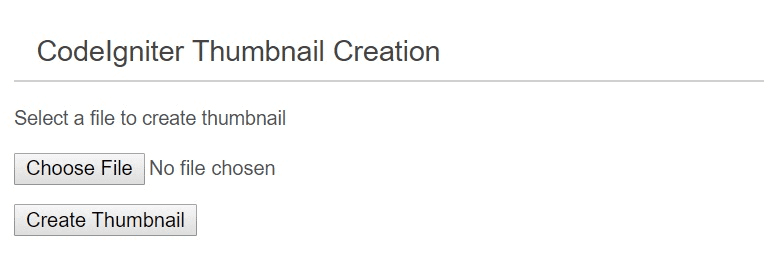
Home Page
Hit URL http://localhost/codeIgniter-thumbnail-creation/ in the browser and you will see below page:
Thumbnail Success
When you select a file and click on Create Thumbnail button you will see message as shown below:

Now if you check upload and upload/thumb folders you will see the original and tumbnail images in the respective folder.
Hope you got idea on thumbnail creation example in CodeIgniter.