Integrate npm web app in spring boot with gradle is basically a multi-module project as we have seen in our earlier tutorials here with maven build in spring boot and here with maven in Eclipse.
But the example on integrate npm web app in spring boot with gradle uses gradle to build the project. Here we basically create two modules one is frontend or client side called web-app and another one is backend called java-app. Obviously as the name suggests web-app, so it will contain only client side technologies to build the application whereas java-app will contain only java technologies to build the application.
You don’t need to install npm going to the web-app folder manually. Npm installation and build will be automatically taken care by gradle build script. This application will also create an executable jar file once gradle build is successfully finished.
Please make sure to have following prerequisites and softwares before proceeding to the next section in order to complete the example integrate npm web app in Spring Boot with Gradle.
Prerequisites
Knowledge of Java, Gradle, Spring Boot
Softwares
JDK configuration
Gradle configuration
Spring Boot dependencies
NPM libraries
Let’s see how do we integrate npm web app in Spring Boot with Gradle. Please go through the step by step process
Step 1. First create a gradle based project in Eclipse. The project name is spring-boot-multi-module-npm-gradle. Now once the project gets created in Eclipse successfully then go to the Step 2.
Step 2. Open build.gradle file under root project spring-boot-multi-module-npm-gradle and put the below code
allprojects  {
	apply plugin: 'eclipse'
	apply plugin: 'idea'
	group = 'com.roytuts'
}
subprojects {
    apply plugin: 'java'
    sourceCompatibility = 1.8
    targetCompatibility = 1.8
}
Here in the example – integrate npm web app in spring boot with gradle – we have configured allprojects{} and subprojects{}. The configurations put into allprojects{} are applicable to all projects including spring-boot-multi-module-npm-gradle and the configurations put into subprojects{} are applicable to only subprojects.
apply plugin inside allprojects{} may or may not required depending on your requirements. The group id com.roytuts is applicable for all projects.
apply plugin inside subprojects{} is required in order to build the project because we need to produce the executable jar file after successful build of the application.
sourceCompatibility and targetCompatibility inside subprojects{} indicate the java version is used to compile and produce the jar. You may use different java version other than 1.8 according to your requirements.
Step 3. Now open the settings.gradle file. You see the root project name is already included in this file.
As this project is spring boot multi-module project with gradle, so you have to include other modules. We already told in our first paragraph that we will create two modules – web-app and java-app.
So we need to include these modules as well into the root project. So create these two modules first into the root project. Create folder web-app and java-app under spring-boot-multi-module-npm-gradle. Now include these two modules by adding the following line to settings.gradle file after the rootProject.name = “spring-boot-multi-module-npm-gradle”.
include 'web-app', 'java-app'
Step 4. Next we need to define build script for individual module. So create build.gradle file separately under web-app and java-app folders.
Step 5. Add below configurations into build script file for web-app module.
buildscript {
    repositories {
        mavenLocal()
        mavenCentral()
    }
    dependencies {
        classpath("com.moowork.gradle:gradle-node-plugin:1.2.0")
    }
}
apply plugin: 'com.moowork.node'
node {
    version = '6.11.3'
    npmVersion = '3.10.10'
    distBaseUrl = 'artifactory-url'
    download = true
                workDir = file("${project.buildDir}/nodejs")
    npmWorkDir = file("${project.buildDir}/npm")
    nodeModulesDir = file("${project.projectDir}")
}
task bundle(type: NpmTask) {
    args = ['install', 'run', 'build']
}
task startNpm(type: NpmTask) {
    args = ['run', 'start', '--max-old-space-size=2048']
}
build.dependsOn(bundle)
So here we have configured the gradle-node-plugin for building npm using gradle. We have also specified the npm configurations using node{…}. We have defined task bundle to install, run and build using NPM. We have configured to run build depending on bundle task because if npm is not installed then npm will be installed first and if npm is already installed then npm configurations will be done only.
Step 6. Add below configurations into build script file for java-app module.
buildscript {
	ext {
		springBootVersion = '1.5.9.RELEASE'
	}
    repositories {
                mavenLocal()
        mavenCentral()
    }
    dependencies {
        classpath("org.springframework.boot:spring-boot-gradle-plugin:${springBootVersion}")
    }
}
apply plugin: 'org.springframework.boot'
jar {
    baseName = 'SpringBootMultiModulesGradleNpm'
    version = '0.0.1-SNAPSHOT'
    manifest {
        attributes("Main-Class": "com.roytuts.main.Application")
    }
    from('../web-app/build') {
       into 'public'
    }
}
jar.dependsOn(':web-app:build')
repositories {
	mavenLocal()
    mavenCentral()
}
dependencies {
	compile("org.springframework.boot:spring-boot-starter-web:${springBootVersion}")
}
Here in the above build script we have added spring boot dependency. This is an example and you may have different dependency or other dependencies along with spring boot dependency according to your requirements. Notice we have applied the only plugin org.springframework.boot because the java plugin will be inherited from root project’s build script. Also the java version is inherited from root project’s java version. We have defined the jar configurations. The executable output jar name is SpringBootMultiModulesGradleNpm, version is 0.0.1-SNAPSHOT, we have also specified the main class name with full package. We are also copying the build files which were produced inside web-app/build folder into public folder inside the jar file. We have also specified that the web-app should be built first using jar.dependsOn(‘:web-app:build’) and should be included or copied into the jar file using
from('../web-app/build') {
    into 'public'
}
Step 7. Now we will run the build and check the output whether it is successful or if we face any issue then we will resolve it. Navigate to the workspace root project directory spring-boot-multi-module-npm-gradle in cmd prompt. Then execute the command gradle clean build to build the project. Once npm installation, configurations, build, executable jar etc. are done then you should see BUILD SUCCESSFUL in the cmd prompt.
Step 8. Now navigate to your build folder to verify whether the executable jar has been produced with required libraries and wep-app builds. Go to the physical path location <eclipse workspace>\spring-boot-multi-module-npm-gradle\java-app\build\libs. You should find two jars, check the executable one – SpringBootMultiModulesGradleNpm-0.0.1-SNAPSHOT.jar.
Now open the jar file using some archive opener or extract the jar file somewhere and check inside it.
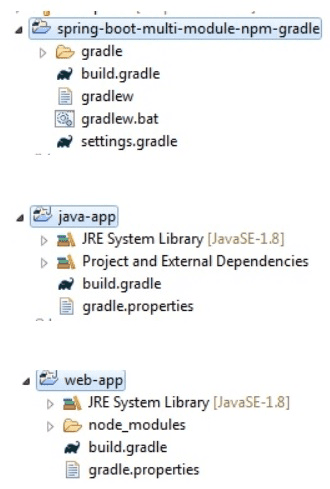
The final project structures look similar to below images:
Congratulations! You have successfully completed example on integrate npm web app in spring boot with gradle.
Thanks for reading.