Introduction
In this guide we will see how to use Google protocol buffers in Java to serialize structured data. I will show you both using gradle and maven build tools. You may choose any programming language from a variety of languages such as Java, C++, C#, Go, Dart, Python to serialize your data using Google protocol buffers.
What are Google Protocol Buffers?
Google protocol buffers are language neutral, platform independent, extensible mechanism for serializing structured data. The structured data as usually defined into XML structure but in Google protocol buffers it’s defined in a different way – smaller, faster and simpler. You define how you want your data to be structured once, then you can use special generated source code to easily write and read your structured data to and from a variety of data streams and using a variety of languages.
Why Use Protocol Buffers?
Let’s say you are going to create a very simple “address book” application that can read and write people’s contact details to and from a file. Each person in the address book has a name, an ID, an email address, and a contact phone number.
How do you serialize and retrieve structured data like this? There are a few ways to solve this problem:
- If you use Java language then you will get the Serialization feature by default, since it’s a language feature. But it may impose issues when you want to share data with applications written in C++ or Python.
- You can write your own code to data items into single string. This is a simple approach but it requires one-off encoding and parsing data and parsing costs small run-time.
- You can serialize data into XML, since human can understand XML easily and there are binding libraries for lots of languages. This is also good if you want to share data with applications written into different languages. However XML is space intensive and encoding/decoding and it can impose a huge performance penalty on the applications. Also navigating an XML DOM tree is considerably more complicated than navigating simple fields in a class.
Protocol buffers are the flexible, efficient, automated solution to solve exactly this problem. With protocol buffers, you write a .proto description of the data structure you wish to store. From that, the protocol buffer compiler creates a class that implements automatic encoding and parsing of the protocol buffer data with an efficient binary format. The generated class provides getters and setters for the fields that make up a protocol buffer and takes care of the details of reading and writing the protocol buffer as a unit. Importantly, the protocol buffer format supports the idea of extending the format over time in such a way that the code can still read data encoded with the old format.
Now we will move onto example on using Google protocol buffers in Java application.
Prerequisites
Java 8 or 12, Eclipse 4.12, Gradle 5.6, Google protocol Buffers – 3.10.0
Creating Project
Create a gradle based project in Eclipse. The name of the project is google-proto-buffer-java.
Updating Build Script
We need to include the required dependency for Google protocol buffers.
plugins {
    id 'java-library'
}

sourceCompatibility = 12
targetCompatibility = 12

repositories {
    mavenCentral()
}

dependencies {
    implementation('com.google.protobuf:protobuf-java:3.11.1')
}
Defining Protocol Format
We will define protocol format here in the file ending with .proto. The definitions in a .proto file are simple: you add a message for each data structure you want to serialize, then specify a name and a type for each field in the message.
Here is the .proto file that defines your messages, employee.proto. I have put this proto file into protoc folder under classpath resource directory src/main/resources.
syntax = "proto3";

option java_package = "com.roytuts.google.proto.buffer.java.model";
option java_outer_classname = "EmployeeProto";

message Employee {
	int32 id = 1;
  	string name = 2;
	string email = 3;

  	enum PhoneType {
    	MOBILE = 0;
    	HOME = 1;
    	WORK = 2;
  	}

	message PhoneNumber {
		string number = 1;
	    PhoneType type = 2;
	}

	repeated PhoneNumber phones = 4;

	enum AddressType {
    	PERMANENT = 0;
    	COMMUNICATION = 1;
  	}

  	message Address {
		string street = 1;
		string city = 2;
		int32 zip = 3;
		string state = 4;
		string country = 5;
	    AddressType type = 6;
	}

	repeated Address address = 5;
}

message Organization {
  repeated Employee employee = 1;
}
In the above file I am using the line syntax = "proto3"; to indicate proto version 3.
The below line tells in which package to generate the Java class(es).
option java_package = "com.roytuts.google.proto.buffer.java.model";We have many message formats and therefore protocol will generate class or enum for each message format. So we want to specify the outer class name that will contain all the classes generated for message structures. So for each .proto file there will be one Java class that basically contains all other classes.
option java_outer_classname = "EmployeeProto";A message is just an aggregate containing a set of typed fields. Many standard simple data types are available as field types, including bool, int32, float, double, and string. You can also add further structure to your messages by using other message types as field types – in the above example the Employee message contains PhoneNumber messages and Address messages, while the Organization message contains Employee messages.
The ” = 1″, ” = 2″ markers on each element identify the unique “tag” that field uses in the binary encoding. Tag numbers 1-15 require one less byte to encode than higher numbers, so as an optimization you can decide to use those tags for the commonly used or repeated elements, leaving tags 16 and higher for less-commonly used optional elements. Each element in a repeated field requires re-encoding the tag number, so repeated fields are particularly good candidates for this optimization.
We marked few fields as repeated and this field may be repeated any number of times (including zero). The order of the repeated values will be preserved in the protocol buffer. Think of repeated fields as dynamically sized arrays.
Note: if you need to add map into message structure then you add a line, for example,
map<string, string> text = 1;The field marked with repeated will generate List<?>.
You will find more description about fields here.
Compiling Your Protocol Buffers
Now that you have a .proto, the next thing you need to do is generate the classes you’ll need to read and write EmployeeProto (and hence Employee, Address and PhoneNumber) messages. To do this, you need to run the protocol buffer compiler protoc on your .proto.
As we are using gradle build tool so we don’t need to install protoc compiler manually. Even we don’t need to run any command manually to generate Java classes. We do everything using gradle build tool. Therefore we will update our above gradle build script.
buildscript {
    repositories {
        mavenCentral()
    }

    dependencies {
        classpath 'com.google.protobuf:protobuf-gradle-plugin:0.8.10'
    }
}

plugins {
    id 'java-library'
    id 'com.google.protobuf' version '0.8.10'
}

sourceCompatibility = 12
targetCompatibility = 12

sourceSets {
    main {
        java {
        	srcDirs 'src/main/java'
        }
        proto {
            srcDirs 'src/main/resources/protoc'
        }
    }
}

protobuf {
	//base directory where you want to generate Java classes
	generatedFilesBaseDir = "$projectDir/src"
  	// Configure the protoc executable
  	protoc {
    	// Download from repositories
    	artifact = 'com.google.protobuf:protoc:3.0.0'
  	}
}

repositories {
    mavenCentral()
}

dependencies {
    implementation('com.google.protobuf:protobuf-java:3.11.1')
}
Look at the above file what changes I have done. We are using protobuf-gradle-plugin for protocol buffers. This plugin is required to compile the .proto files. Then we apply the plugin using the following line:
id "com.google.protobuf" version "0.8.10"Next you need to configure for Java source directory and .proto files directory.
sourceSets {
    main {
        java {
        	srcDirs 'src/main/java'
        }
        proto {
            srcDirs 'src/main/resources/protoc'
        }
    }
}
Now you need to configure proto buffers compilers for generating Java classes.
Here I have set the root directory of the generated class as project root directory’s src folder otherwise it will generate under build directory.
You can even use local executable for proto compiler (protoc), here I am using from repository – artifact = 'com.google.protobuf:protoc:3.0.0'.
protobuf {
	//base directory where you want to generate Java classes
	generatedFilesBaseDir = "$projectDir/src"
  	// Configure the protoc executable
  	protoc {
    	// Download from repositories
    	artifact = 'com.google.protobuf:protoc:3.0.0'
  	}
}
Finally we need dependency for proto buffers – implementation('com.google.protobuf:protobuf-java:3.10.0').
If you are choosing to use maven as a build tool then you can use the below pom.xml file.
<project xmlns="http://maven.apache.org/POM/4.0.0"
	xmlns:xsi="http://www.w3.org/2001/XMLSchema-instance"
	xsi:schemaLocation="http://maven.apache.org/POM/4.0.0 http://maven.apache.org/xsd/maven-4.0.0.xsd">
	<modelVersion>4.0.0</modelVersion>

	<groupId>com.roytuts</groupId>
	<artifactId>google-protocol-buffer-java-maven</artifactId>
	<version>0.0.1-SNAPSHOT</version>
	<packaging>jar</packaging>

	<properties>
                <protobuf.version>3.11.1</protobuf.version>
		<project.build.sourceEncoding>UTF-8</project.build.sourceEncoding>
	</properties>

	<dependencies>
		<dependency>
			<groupId>com.google.protobuf</groupId>
			<artifactId>protobuf-java</artifactId>
			<version>${protobuf.version}</version>
		</dependency>
	</dependencies>

	<build>
		<extensions>
			<extension>
				<groupId>kr.motd.maven</groupId>
				<artifactId>os-maven-plugin</artifactId>
				<version>1.6.1</version>
			</extension>
		</extensions>
		<plugins>
			<plugin>
				<groupId>org.apache.maven.plugins</groupId>
				<artifactId>maven-compiler-plugin</artifactId>
				<version>3.8.1</version>
				<configuration>
					<source>12</source>
					<target>12</target>
				</configuration>
			</plugin>
			<plugin>
				<groupId>org.xolstice.maven.plugins</groupId>
				<artifactId>protobuf-maven-plugin</artifactId>
				<version>0.6.1</version>
				<configuration>
					<protoSourceRoot>src/main/resources/protoc</protoSourceRoot>
					<outputDirectory>src/main/java</outputDirectory>
					<clearOutputDirectory>false</clearOutputDirectory>
					<protocArtifact>com.google.protobuf:protoc:${protobuf.version}:exe:${os.detected.classifier}</protocArtifact>
				</configuration>
				<executions>
					<execution>
						<id>protobuf-compile</id>
						<phase>generate-sources</phase>
						<goals>
							<goal>compile</goal>
						</goals>
						<configuration>
							<attachProtoSources>true</attachProtoSources>
							<writeDescriptorSet>true</writeDescriptorSet>
							<includeSourceInfoInDescriptorSet>true</includeSourceInfoInDescriptorSet>
							<includeDependenciesInDescriptorSet>true</includeDependenciesInDescriptorSet>
							<attachDescriptorSet>true</attachDescriptorSet>
							<descriptorSetClassifier>descriptorSet</descriptorSetClassifier>
						</configuration>
					</execution>
					<execution>
						<id>protobuf-compile-custom</id>
						<phase>generate-sources</phase>
						<goals>
							<goal>compile-custom</goal>
						</goals>
						<configuration>
							<attachProtoSources>false</attachProtoSources>
							<writeDescriptorSet>false</writeDescriptorSet>
							<pluginId>grpc-java</pluginId>
							<pluginArtifact>io.grpc:protoc-gen-grpc-java:1.25.0:exe:${os.detected.classifier}</pluginArtifact>
						</configuration>
					</execution>
				</executions>
			</plugin>
		</plugins>
	</build>
</project>
You can also use the short version of the protobuf-maven-plugin:
<plugin>
	<groupId>org.xolstice.maven.plugins</groupId>
	<artifactId>protobuf-maven-plugin</artifactId>
	<version>0.6.1</version>
	<configuration>
		<protocArtifact>com.google.protobuf:protoc:${protobuf.version}:exe:${os.detected.classifier}</protocArtifact>
		<pluginId>grpc-java</pluginId>
		<pluginArtifact>io.grpc:protoc-gen-grpc-java:1.25.0:exe:${os.detected.classifier}</pluginArtifact>
		<clearOutputDirectory>false</clearOutputDirectory>
		<protoSourceRoot>${project.basedir}/src/main/resources/protoc</protoSourceRoot>
		<outputDirectory>${project.basedir}/src/main/java/</outputDirectory>
	</configuration>
	<executions>
		<execution>
			<goals>
				<goal>compile</goal>
				<goal>compile-custom</goal>
			</goals>
		</execution>
	</executions>
</plugin>
Building the Application
Build the application using command gradlew clean build or gradle clean build from command line tool.
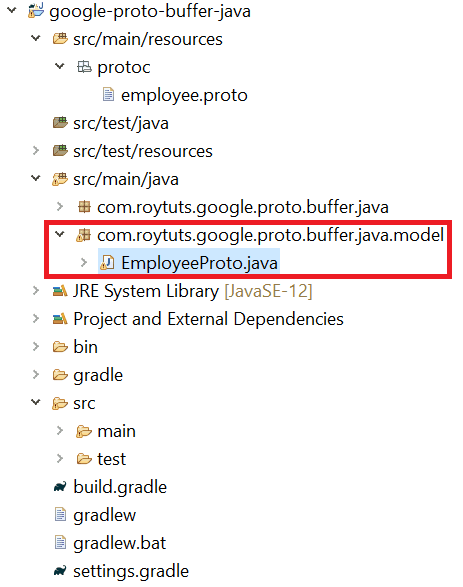
You will see that the EmploeeProto.java will be generated under the package you specified in .proto file under the directory src/main/java.
The Protocol Buffer API
Now you can look at the generated class and see what classes and methods the compiler has created. If you look at the class EmployeeProto.java, you can see it defines a class EmployeeProto that includes all other classes for message structures. Each class has its own Builder class that you use to create instances of that class.
Both messages and builders have auto-generated accessor methods for each field of the message; messages have only getters while builders have both getters and setters. More details can be found here.
Writing A Message
Now let’s try using your protocol buffer classes. The below class shows how to create message for each class.
package com.roytuts.google.proto.buffer.java;

import com.roytuts.google.proto.buffer.java.model.EmployeeProto.Employee;
import com.roytuts.google.proto.buffer.java.model.EmployeeProto.Employee.Address;
import com.roytuts.google.proto.buffer.java.model.EmployeeProto.Employee.AddressType;
import com.roytuts.google.proto.buffer.java.model.EmployeeProto.Employee.PhoneNumber;
import com.roytuts.google.proto.buffer.java.model.EmployeeProto.Employee.PhoneType;
import com.roytuts.google.proto.buffer.java.model.EmployeeProto.Organization;

public class GoogleProtoBufferJavaTest {

	public static void main(String[] args) {
		PhoneType phoneType = PhoneType.MOBILE;

		PhoneNumber phoneNumber = PhoneNumber.newBuilder().setNumber("1234567").setType(phoneType).build();

		AddressType addressType = AddressType.PERMANENT;

		Address address = Address.newBuilder().setStreet("Street").setCity("City").setZip(123456).setState("State")
				.setCountry("Country").setType(addressType).build();

		Employee employee = Employee.newBuilder().setId(1234).setName("Soumitra").setEmail("soumitra@email.com")
				.addPhones(phoneNumber).addAddress(address).build();

		Organization organization = Organization.newBuilder().addEmployee(employee).build();

		for (Employee emp : organization.getEmployeeList()) {
			System.out.println(emp.getId());
			System.out.println(emp.getName());
			System.out.println(emp.getEmail());
			System.out.println(emp.getPhonesList().get(0));
			System.out.println(emp.getAddressList().get(0));
		}
	}

}
Testing the Application
Executing the above main class will give you below output:
1234
Soumitra
soumitra@email.com
number: "1234567"

street: "Street"
city: "City"
zip: 123456
state: "State"
country: "Country"
That’s all. Hope you got an idea how to use Google protocol buffers in Java code.
If you need more customization or information you can always go through Google’s documentation page.
Source Code
Download Gradle Project Download Maven Project
Thanks for reading.