MongoDB
Here I will tell you how to install zip version of MongoDB in Windows environment. I will install here MongoDB Community edition. If you want to install MongoDB msi version then you can read Step 4 at https://roytuts.com/mongodb-php7-xampp-windows/. I will download latest MongoDB server and configure in Windows environment.
MongoDB Version
4.4.0/7.0.2, Windows 10/11 64 Bit OS, MongoDB Shell 2.0.2 (Required for MongoDB Server 6 or higher)
Download MongoDB
The first step would be to download the MongoDB server community edition from MongoDB Download Center.
Choose the ZIP version of your package and choose your Operating version similar to the below image:
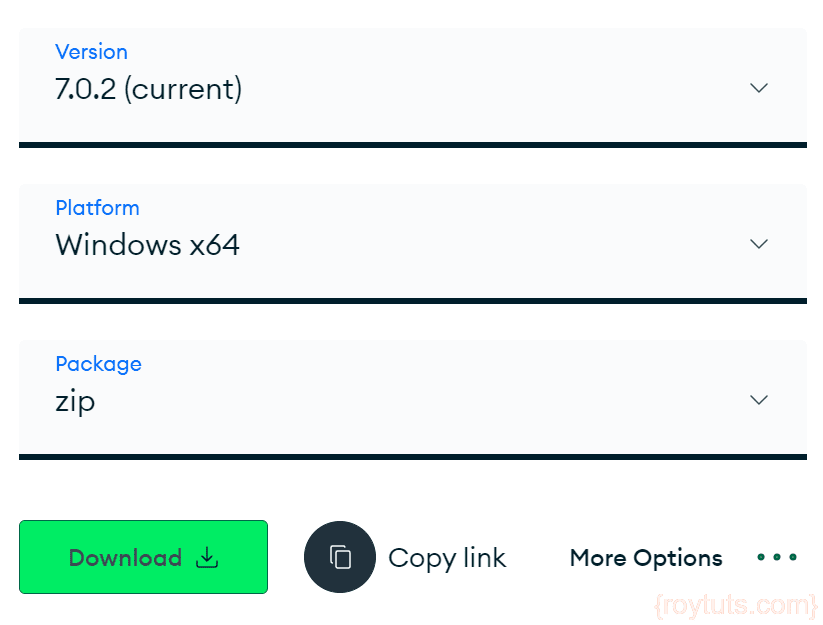
Here I have chosen Windows as a platform, you can choose as per your Operating System version.
You must select the Package as ZIP.
Now click on Download button and save into an appropriate location on your computer’s disk.
Install MongoDB
Now extract the zip file into a drive, for example, C:\. You can also extract in any location as per your choice or requirements.
Create Directory – data\db
Now create a directory called data\db in parallel to the root directory of the MongoDB extracted folder.
The data\db directory is required to save the database records.
Remember if you do not create such directory then you will get below error in the console output while you will try to run the MongoDB server at later point of time:
exception in initAndListen: NonExistentPath: Data directory <disk drive of mongodb installation root directory>:\data\db\ not found., terminatingRun the MongoDB Server
Now I will run our MongoDB server by executing the following command from command (cmd) window.
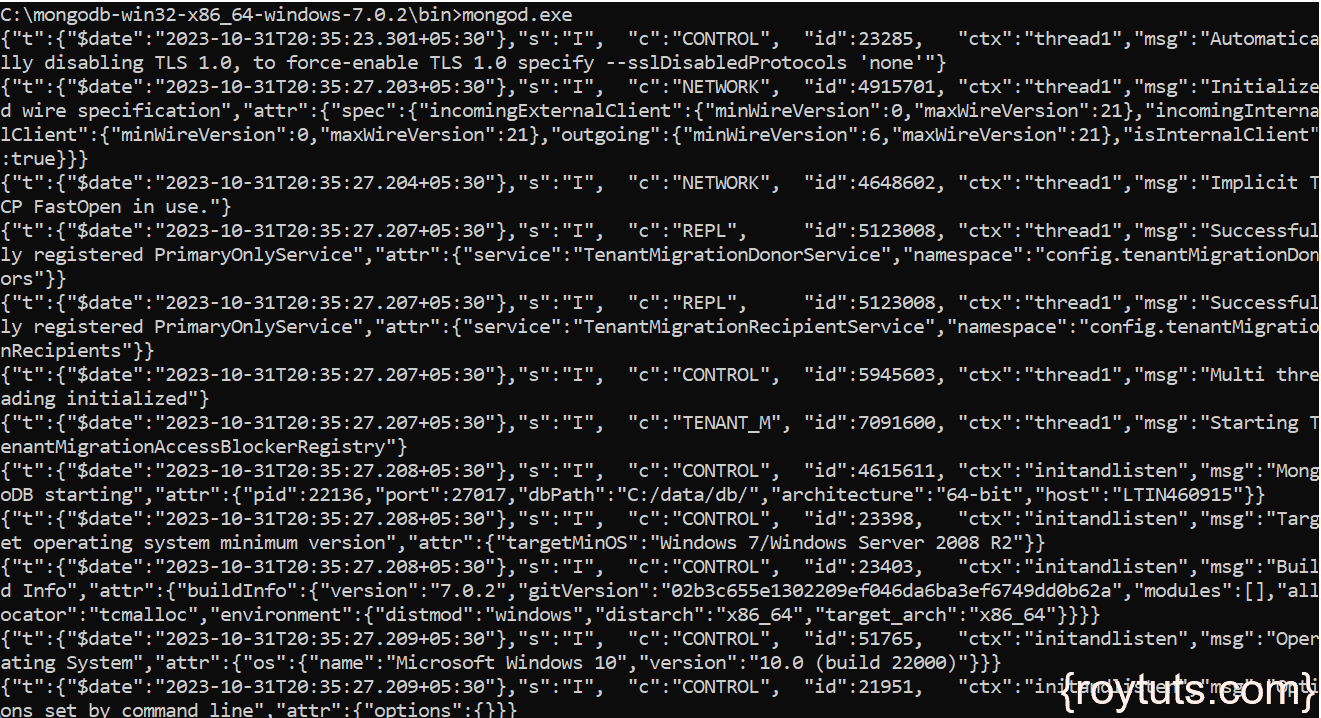
Navigate to the <MongoDB root directory>/bin folder in cmd window and execute the mongod.exe file.
For example,
C:\mongodb-x.y.z\bin>mongod.exeWhere x, y, z indicate the version number of the MongoDB server.
Once your server starts successfully, you will see similar to the below output in the console depending on the version of the Mongo DB server.
Run MongoDB Client
I want to test whether our MongoDB server is running or not and perform some database operations. So run the mongo.exe file in the bin folder in cmd window.
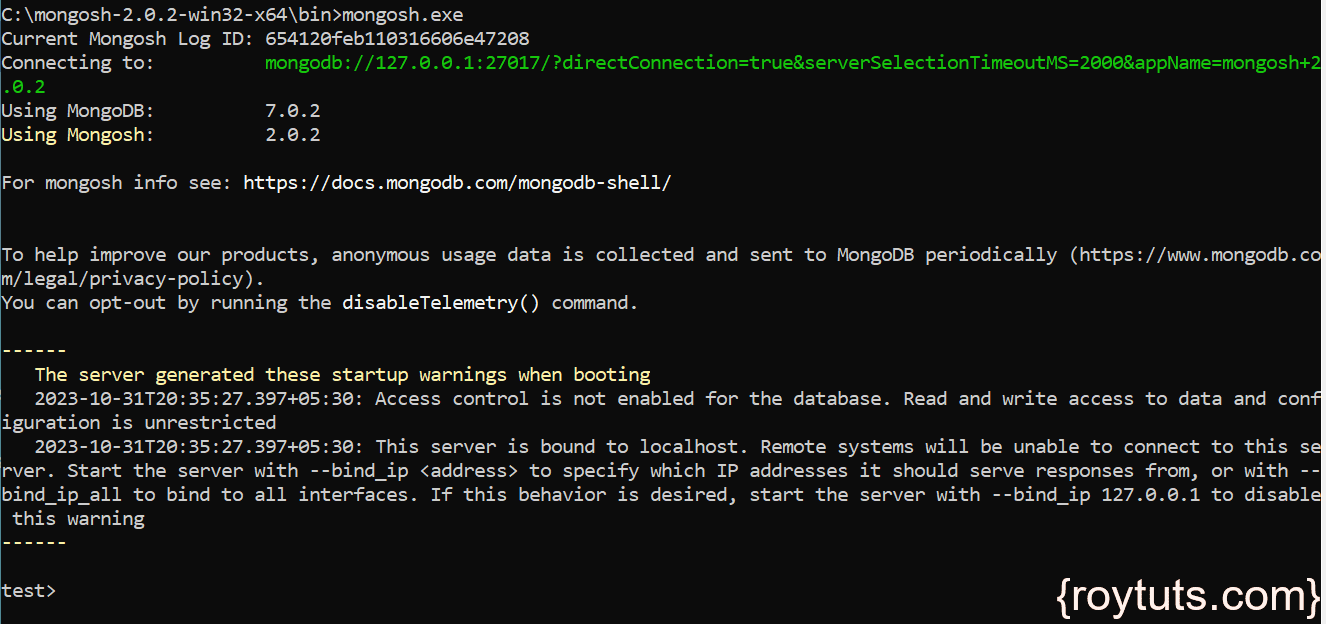
Please note that for MongoDB server 6 onward you need to download the client separately because the client is not shipped with the Mongo server.
For MongoDB server 7.x, the following output gets displayed in the cmd window once you connect to the MongoDB server.
You need to extract the downloaded MongoDB client, you need to execute the mongosh.exe from the bin folder of the client folder.
For example, for MongoDB 4.4.0, you can execute the following command:
C:\mongodb-4.4.0\bin>mongo.exeOnce your MongoDB client successfully connects to the mongoDB server, then you will find below output along with other output:
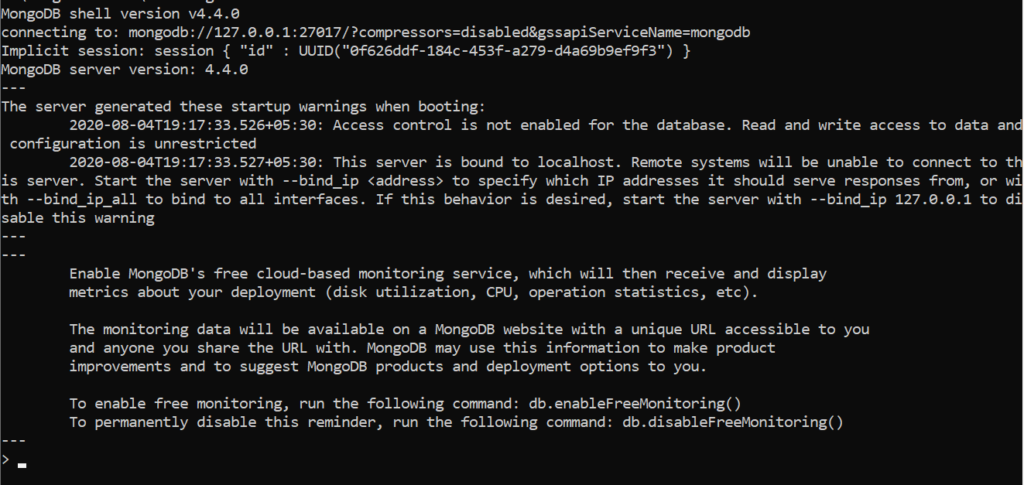
So a session will be established with your server for allowing client perform database operations.
Performing MongoDB Operations
I will show you few basic things here but you can always find more commands MongoDB Commands.
The default database that comes with MongoDB is test.
I will perform all operations on MongoDB Client using the command.
Creating Database
Create a new database by using below command on the MongoDB Client terminal.
use roytutsChecking Database
Now I will check what is our current database I am using for our application by using below command.
dbThe above command will show you the database roytuts.
Creating Collection
I have created database, now I need to create collection, where our data will be stored.
Use below command to create a collection called user:
db.runCommand( { create: "user" });In MongoDB version 7.x, use the following command:
db.createCollection("user");The output will be:
{ ok: 1 }Selecting Collections
You can select collections for your current database using below command:
db.getCollectionNames();The output will be:
[ 'user' ]Removing Records From Collection
If you want to remove all records from a collection, then you can execute below command.
db.user.remove({})Where user is the name of the collection.
In version 7.x, you need to use methods like deleteOne, deleteMany, findOneAndDelete or bulkWrite to delete or remove because remove method has been deprecated. For example:
db.user.deleteOne({});If you want to remove a particular record, for example, you want to remove a user whose name is Soumitra, then you can use below command.
db.user.remove({"name":"Soumitra"})In version 7.x, the above command can be written as follows:
db.user.deleteOne({"name":"Soumitra"});Dropping Collection
To drop a collection from database you can execute below command.
db.user.drop()Where user is the name of the collection.
The output of the above command will be true.
That’s all. I hope you got an idea on installing zip version of MongoDB in Windows environment.
Thanks alot
great help
that was really helpful. thank you very much. :)