Spring Data JPA CRUD
You will see here Spring Boot Data JPA CRUD example. CRUD is an acronym that means Create Read Update and Delete operations. I will use an in-memory h2 database in order to perform CRUD operations in database. I have other example on Spring Data JPA CRUD example but the application does not use Spring Boot. In this example, I will use Spring Boot framework in this example. I will use Spring REST controller to expose the CRUD operations into REST API.
Prerequisites
Java 1.8/19, Gradle 5.4.1, Maven 3.8.5, Spring Boot 3.2.4
Please go through the following sections in order to implement the Spring Boot Data JPA CRUD example.
Project Setup
I will create here maven based project and the following pom.xml file can be used for your project.
In the below build file I have included spring boot web, spring boot data jpa and h2 database. The in-memory h2 database is very useful when you need to do a quick PoC because it saves you a lots of time and effort required to setup a database.
<?xml version="1.0" encoding="UTF-8"?>

<project xmlns="http://maven.apache.org/POM/4.0.0"
	xmlns:xsi="http://www.w3.org/2001/XMLSchema-instance"
	xsi:schemaLocation="http://maven.apache.org/POM/4.0.0 http://maven.apache.org/xsd/maven-4.0.0.xsd">
	<modelVersion>4.0.0</modelVersion>

	<groupId>com.roytuts</groupId>
	<artifactId>spring-boot-data-jpa-crud</artifactId>
	<version>0.0.1-SNAPSHOT</version>

	<properties>
		<project.build.sourceEncoding>UTF-8</project.build.sourceEncoding>
		<maven.compiler.source>19</maven.compiler.source>
		<maven.compiler.target>19</maven.compiler.target>
	</properties>

	<parent>
		<groupId>org.springframework.boot</groupId>
		<artifactId>spring-boot-starter-parent</artifactId>
		<version>3.2.4</version>
	</parent>

	<dependencies>
		<dependency>
			<groupId>org.springframework.boot</groupId>
			<artifactId>spring-boot-starter-web</artifactId>
		</dependency>

		<dependency>
			<groupId>org.springframework.boot</groupId>
			<artifactId>spring-boot-starter-data-jpa</artifactId>
		</dependency>

		<dependency>
			<groupId>com.h2database</groupId>
			<artifactId>h2</artifactId>
		</dependency>

		<dependency>
			<groupId>org.springframework.boot</groupId>
			<artifactId>spring-boot-devtools</artifactId>
			<scope>runtime</scope>
		</dependency>
	</dependencies>

	<build>
		<plugins>
			<plugin>
				<groupId>org.springframework.boot</groupId>
				<artifactId>spring-boot-maven-plugin</artifactId>
			</plugin>
		</plugins>
	</build>
</project>
Entity Class
I will work with in-memory h2 database, where I will perform CRUD operations. Therefore I need to create entity class to map the database column with Java class attributes.
I want to store website details, such as, website id, name and URL of the website.
Another beauty of Spring Boot Data JPA starter is the below class will create the required table in the database. Even I didn’t mention any column name, so it will create same column name in the table as the Java attributes.
So the corresponding website entity class can be defined as:
package com.roytuts.spring.boot.data.jpa.crud.entity;

@Entity
public class Website {
	@Id
	@GeneratedValue(strategy = GenerationType.IDENTITY)
	private Integer id;
	private String name;
	private String url;
	public Website() {
	}
	public Website(Integer id, String name, String url) {
		this.id = id;
		this.name = name;
		this.url = url;
	}
	//getters and setters
}
VO Class
It is always good idea to create a VO or DTO class to return as a response object from REST controller instead of returning the entity class as a response object.
The VO class is also similar to the above entity class.
package com.roytuts.spring.boot.data.jpa.crud.vo;

public class WebsiteVo {
	private Integer id;
	private String name;
	private String url;
	public WebsiteVo() {
	}
	public WebsiteVo(Integer id, String name, String url) {
		this.id = id;
		this.name = name;
		this.url = url;
	}
        //getters and setters
}
Repository Interface
Spring Data JPA provides built-in methods for performing basic CRUD operations and you don’t need to write any query method.
Another beauty of Spring Data JPA is that you write Java method to query your database and Spring generates the corresponding query from your method for performing database operations.
I have just extended the JpaRepository interface but I did not write any query method inside this repository because we will use Spring’s built-in methods for performing CRUD operations.
package com.roytuts.spring.boot.data.jpa.crud.repository;

public interface WebsiteRepository extends JpaRepository<Website, Integer> {
}
Service Class
The service class is used generally if you want to perform some business logic or conversion to different data.
Here in the below service method I will convert entity class to VO class using Java 8’s stream API.
I have used Java 8’s map() method to map entity to VO object.
package com.roytuts.spring.boot.data.jpa.crud.service;

@Service
public class WebsiteService {
	@Autowired
	private WebsiteRepository repository;
	public List<WebsiteVo> getWebsiteList() {
		return repository.findAll().stream().map(w -> {
			WebsiteVo vo = new WebsiteVo(w.getId(), w.getName(), w.getUrl());
			return vo;
		}).collect(Collectors.toList());
	}
	public WebsiteVo getWebsiteById(Integer id) {
		return repository.findById(id).map(w -> {
			WebsiteVo vo = new WebsiteVo(w.getId(), w.getName(), w.getUrl());
			return vo;
		}).orElseGet(null);
	}
	public void saveWebsite(WebsiteVo vo) {
		Website website = new Website();
		website.setName(vo.getName());
		website.setUrl(vo.getUrl());
		repository.save(website);
	}
	public void updateWebsite(WebsiteVo vo) {
		Website website = new Website(vo.getId(), vo.getName(), vo.getUrl());
		repository.save(website);
	}
	public void deleteWebsite(WebsiteVo vo) {
		Website website = new Website(vo.getId(), vo.getName(), vo.getUrl());
		repository.delete(website);
	}
}
REST Controller
Now I will expose our CRUD operations onto REST API so that any client can call our REST service and perform CRUD operations.
Exposing the operations on REST makes loosely coupled to integrate with any client technologies.
Notice how I have performed CRUD operations using the same endpoint with different HTTP methods.
package com.roytuts.spring.boot.data.jpa.crud.rest.controller;

@RestController
public class WebsiteRestController {
	@Autowired
	private WebsiteService service;
	@GetMapping("/website/{id}")
	public ResponseEntity<WebsiteVo> getWebsite(@PathVariable Integer id) {
		return new ResponseEntity<WebsiteVo>(service.getWebsiteById(id), HttpStatus.OK);
	}
	@GetMapping("/website")
	public ResponseEntity<List<WebsiteVo>> getWebsiteList() {
		return new ResponseEntity<List<WebsiteVo>>(service.getWebsiteList(), HttpStatus.OK);
	}
	@PostMapping("/website")
	public ResponseEntity<String> saveWebsite(@RequestBody WebsiteVo websiteVo) {
		service.saveWebsite(websiteVo);
		return new ResponseEntity<String>("New website successfully saved", HttpStatus.OK);
	}
	@PutMapping("/website")
	public ResponseEntity<String> updateWebsite(@RequestBody WebsiteVo websiteVo) {
		service.updateWebsite(websiteVo);
		return new ResponseEntity<String>("New website successfully updated", HttpStatus.OK);
	}
	@DeleteMapping("/website")
	public ResponseEntity<String> deleteWebsite(@RequestBody WebsiteVo websiteVo) {
		service.deleteWebsite(websiteVo);
		return new ResponseEntity<String>("New website successfully deleted", HttpStatus.OK);
	}
}
Application Properties File
I will create an application.yml file that will hold some configurations. You can also create application.properties file. This file should be put under src/main/resources folder.
The below YAML or properties file contains SQL format and h2 database console enablement to see the queries executed during performing of the CRUD operations.
spring:
   jpa:
      show-sql: true
   h2:
      console:
         enabled: true
The following content is written into the application.properties file:
spring.jpa.show-sql=true
spring.h2.console.enabled=true
Main Class
Creating a main would be sufficient to deploy our application into the Tomcat server. This is a great advantage that you just need to let Spring know that it is your Spring Boot Application using @SpringBootApplication and main class.
I also need to tell Spring where the entity class and repository interface exist.
package com.roytuts.spring.boot.data.jpa.crud;

@SpringBootApplication
@EntityScan("com.roytuts.spring.boot.data.jpa.crud.entity")
@EnableJpaRepositories("com.roytuts.spring.boot.data.jpa.crud.repository")
public class SpringBootDataJpaCrudApp {
	public static void main(String[] args) {
		SpringApplication.run(SpringBootDataJpaCrudApp.class, args);
	}
}
Testing the CRUD Application
Run the main class to start the application.
Creating Website
Create websites using REST client as shown below:
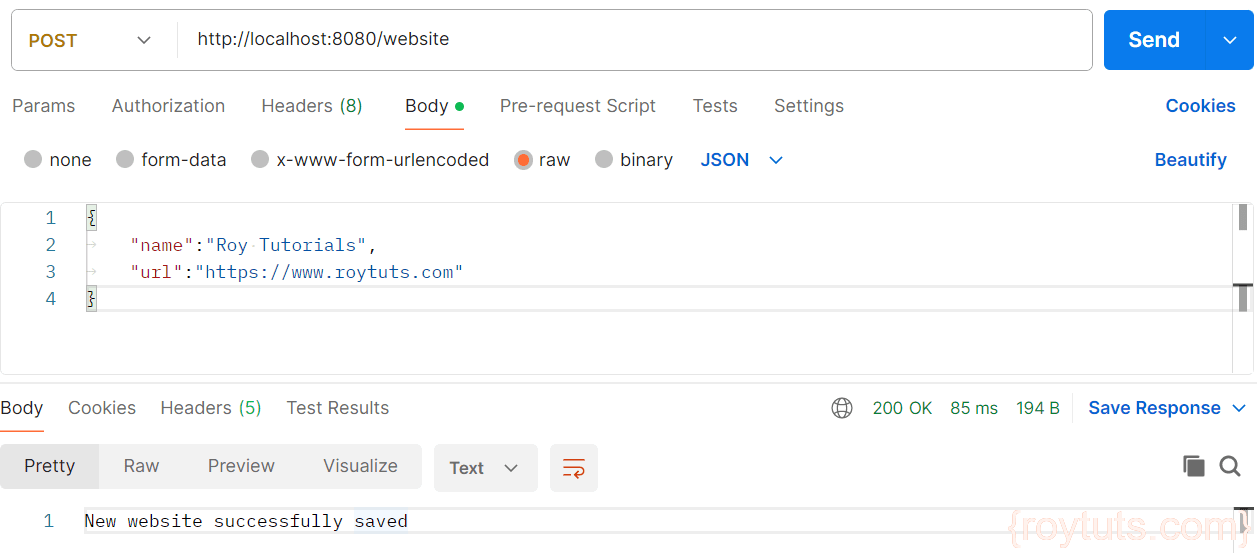
In the console you will see below output:
Hibernate: insert into website (id, name, url) values (null, ?, ?)Reading Websites
So when you make the below call to see list of websites then you will get below output:
You will get below output in the console:
Hibernate: select website0_.id as id1_0_, website0_.name as name2_0_, website0_.url as url3_0_ from website website0_Updating Website
Now let’s say we want to update website with below information:
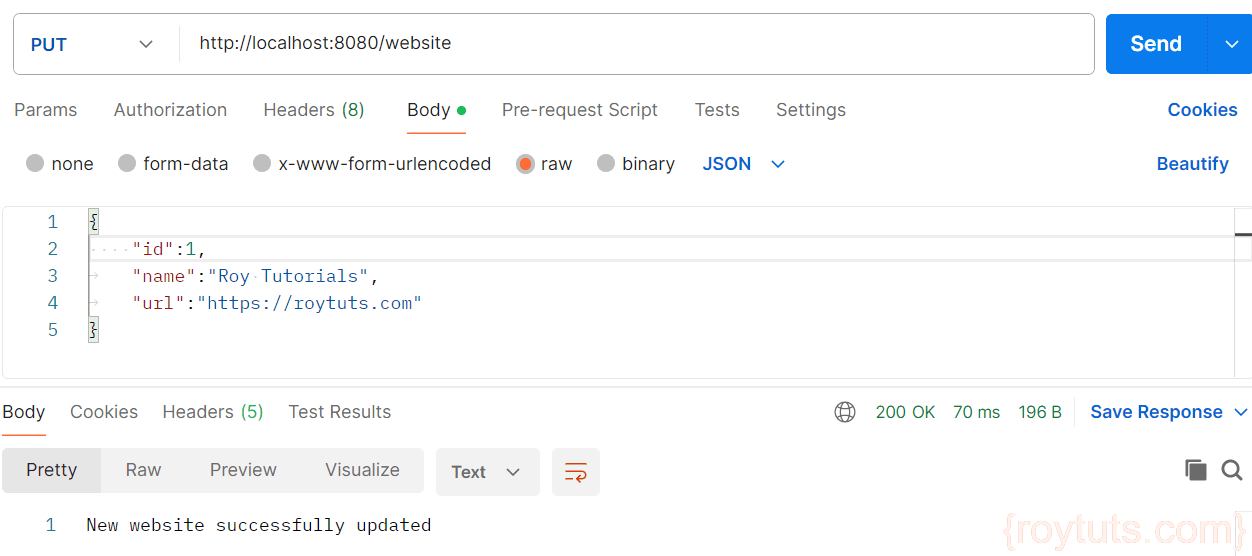
You will find console output:
Hibernate: update website set name=?, url=? where id=?Deleting Website
Send below information to delete a website:
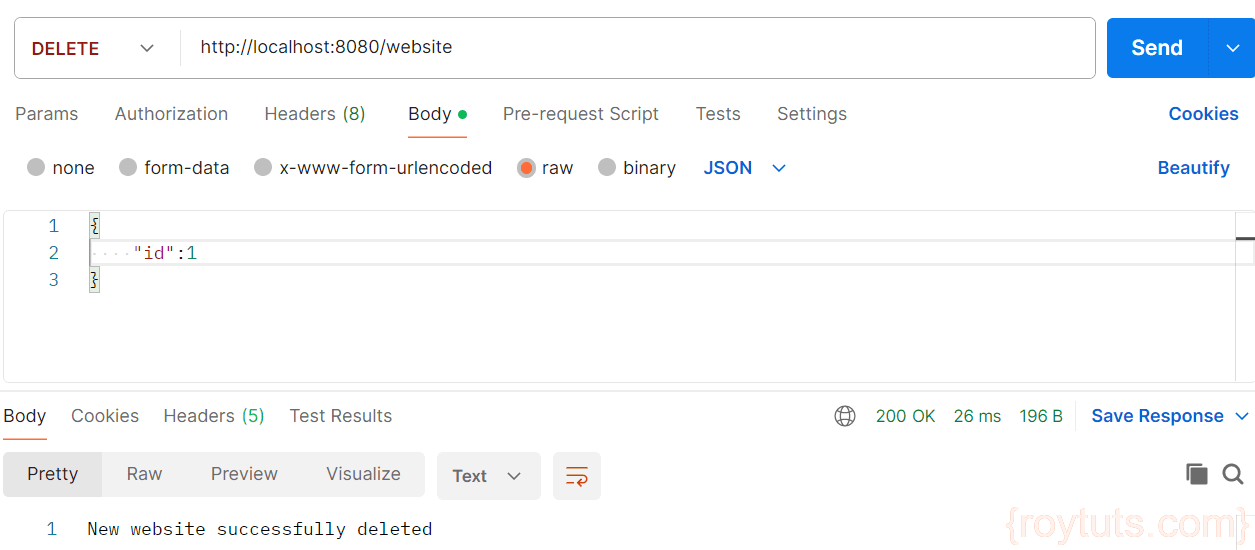
You will see below output in the console:
Hibernate: delete from website where id=?
Congratulations, great job, my friend.
nice work