Introduction
This post will show you how to wrap REST API with GraphQL. So here we will use graphql-yoga from NPM package to create GraphQL server. When you come to know that GraphQL has advantages over REST API and you want to start using GraphQL but you are stuck with legacy REST APIs. Then this tutorial may help you to wrap your existing REST API with GraphQL. Hence you don’t need to rewrite your existing REST APIs into GraphQL but you can utilize them with GraphQL.
GraphQL is an open source query language introduced by Facebook in the year of 2015. I would not explain here about GraphQL as Facebook has already explained in details and can be found here. You will also find the differences between REST and GraphQL.
In this application we will also build a GraphQL IDE or Playground for performing query and mutation on GraphQL API. GraphQL IDE is similar to Postman or REST client but GraphQL IDE is used for GraphQL API, whereas Postman or REST client is used for REST API.
You may also like to read Wrap REST API with GraphQL in Spring Boot.
You can use any technology for implementing GraphiQL server. Here we will use graphql-yoga implement GraphQL server.
Prerequisites
Knowledge on GraphQL, REST
Node v11.3.0, npm 6.4.1
Go through Spring Boot Data JPA CRUD Example
Example with Source Code
Please go through the following sections to wrap existing REST API with GraphQL.
As I mentioned the URL in prerequisite section on Spring Boot Data JPA CRUD Example, so I will assume that you have similar kind of existing REST API for performing basic CRUD operations.
Creating Project Directory
Open a cmd prompt and create a directory called graphql-rest-wrapper at your location on disk drive using the below command:
mkdir graphql-rest-wrapperThis is the root directory of your GraphQL server. So we may not mention this project root directory every time we create some folders or files but you should always create them with respect to project root directory.
Creating Manifest File
Now we will create a manifest file called package.json. The package.json file is the heart of Node.js system. It is the manifest file of any Node.js project and contains the metadata of the project.
Now navigate to the directory graphql-rest-wrapper in the cmd prompt and execute below command to initialize the project by creating package.json file in the project root directory.
npm init -yYou will see package.json file will be creates with below content.
{
  "name": "graphql-rest-wrapper",
  "version": "1.0.0",
  "description": "",
  "main": "index.js",
  "scripts": {
    "test": "echo \"Error: no test specified\" && exit 1"
  },
  "keywords": [],
  "author": "",
  "license": "ISC"
}
Creating src Folder
Create src folder under the project root directory graphql-rest-wrapper.
src stands for source, and is the raw code before minification or concatenation or some other compilation – used to read/edit the code.
Execute below command to create src folder.
mkdir srcCreating index.js
In Node.js, Node itself is the web server so you don’t need to name anything index.js but it’s easier to understand which file to run first.
index.js typically handles your app startup, routing and other functions of your application and does require other modules to add functionality.
Create index.js file under src directory by executing below command.
echo > src/index.jsIdentifying REST Endpoints
The first task is to identify the existing REST end-points and the example we are using here Spring Boot Data JPA CRUD Example has the following endpoints:
GET /websites
GET /webste/{id}
POST /website
PUT /website
DELETE /website
The endpoint – GET /websites – lists all the available website information from the server.
The endpoint – GET /website/{id} – lists the available website information for a given website id from the server.
The endpoint – POST /website – adds a new website information to the server. The website information is passed in the body as a JSON payload.
The endpoint – PUT /website – updates an existing website information to the server. The website information is passed in the body as a JSON payload.
The endpoint – DELETE /website – deletes an existing website information from the server. The website information is passed in the body as a JSON payload.
Identifying Data Model
Next task is to identify the data model of the existing REST API and we know that the existing REST API Spring Boot Data JPA CRUD Example has below information for a particular website:
id, name, urlThe id indicates the Id of the website, name indicates the name of the website and url indicates the URL of the website.
Defining GraphQL Schema
We are creating a new file schema.graphql in src directory with the following content:
type Query {
  websites: [Website!]!
  website(id: ID!): Website
}

type Mutation {
  addWebsite(name: String!, url: String!): String!
  updateWebsite(id: ID!, name: String!, url: String!): String!
  deleteWebsite(id: ID!): String!
}

type Website {
  id: ID
  name: String
  url: String
}
This schema defines top level fields (in the type Query): websites which returns the details of all available websites and website that returns the details of a particular website for a given id.
It also defines the Website which has fields id, name and url.
The Domain Specific Language shown above which is used to describe a schema is called Schema Definition Language or SDL. More details about it can be found here.
We know that Query is used to query GraphQL server for fetching or reading data.
We also need to save new website information, update existing website information or delete existing website information. Therefore we used Mutation to perform create, update and delete operations.
In the above Query, we have used [] and it means it will return a list of websites.
Notice we have also used ! to denote that the parameter is required. If you make a parameter required and if you do not pass value or get value from server on this parameter then GraphQL will throw errors.
Creating Resolvers for Schema
The behaviour of a GraphQL API is the implementation of the schema definition in the form of resolver functions. Each field in the GraphQL schema is backed by exactly one resolver that knows how to fetch the data for that specific field.
The implementation of the resolvers is fairly straightforward. All we do is making calls to the corresponding REST endpoints and immediately return the responses we receive:
Now open index.js file and write below code into it.
const { GraphQLServer } = require('graphql-yoga')
const fetch = require('node-fetch')

const baseURL = `http://localhost:8080`

const resolvers = {
  Query: {
    websites: () => {
      return fetch(`${baseURL}/website`).then(res => res.json())
    },
    website: (parent, args) => {
      const { id } = args
      return fetch(`${baseURL}/website/${id}`).then(res => res.json())
    }
  },
  Mutation: {
    addWebsite: (parent, args) => {
       const website = {
        name: args.name,
        url: args.url,
      }
	  return fetch(`${baseURL}/website`, {
			method: 'POST',
			body: JSON.stringify(website),
			headers: { 'Content-Type': 'application/json' }
		}).then(res => res.text());
    },
	updateWebsite: (parent, args) => {
       const website = {
		id: args.id,
        name: args.name,
        url: args.url,
      }
	  return fetch(`${baseURL}/website`, {
			method: 'PUT',
			body: JSON.stringify(website),
			headers: { 'Content-Type': 'application/json' }
		}).then(res => res.text());
    },
	deleteWebsite: (parent, args) => {
       const website = {
		id: args.id
      }
	  return fetch(`${baseURL}/website`, {
			method: 'DELETE',
			body: JSON.stringify(website),
			headers: { 'Content-Type': 'application/json' }
		}).then(res => res.text());
    }
  }
}

const server = new GraphQLServer({
  typeDefs: './src/schema.graphql',
  resolvers,
})

server.start(() => console.log(`Server is running on http://localhost:4000`))
We query website information using Query, we add, update or delete website information using Mutation.
We extract parameters, such as, id, name, url from args.
Finally we define the server and pass schema and resolvers. We also specify the port 4000 for server.
Running the Server
Execute below command to run the GraphQL server.
node src/index.jsYou will get below output in the cmd prompt:

Opening GraphQL IDE
Open GraphQL IDE or Playground by hitting the URL http://localhost:4000 in the browser.
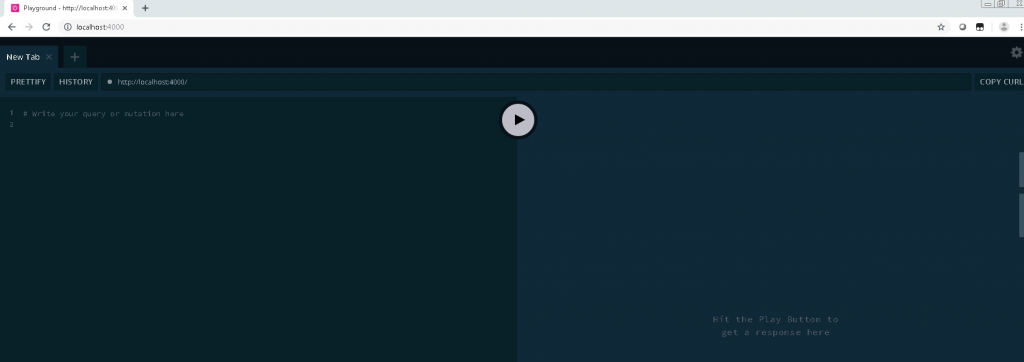
Now you can execute Query or Mutation to perform CRUD(Create, Read, Update, Delete) operations.
Testing the Application
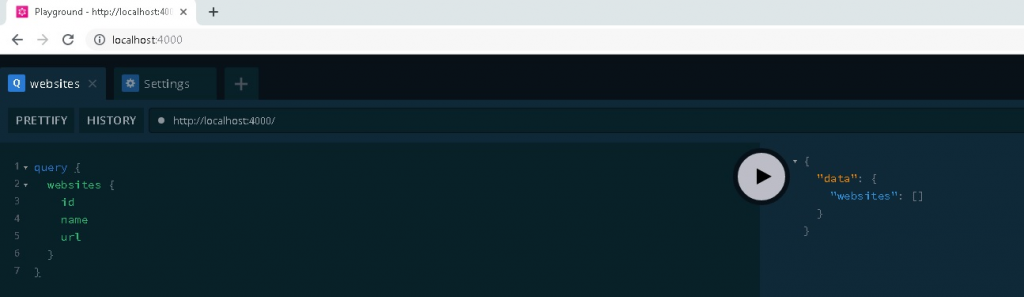
Reading Websites
If you do not have any existing website information then you will get below output in GraphQL IDE while you query for webaites.
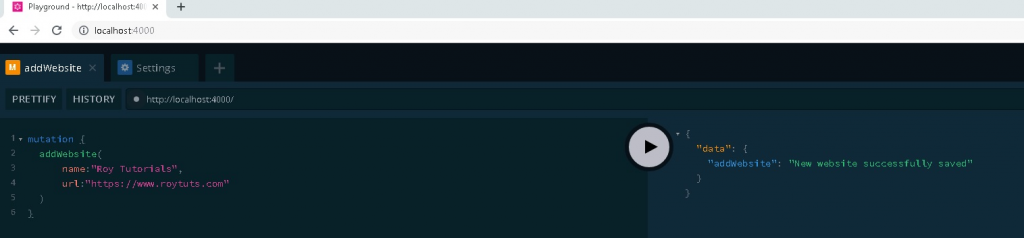
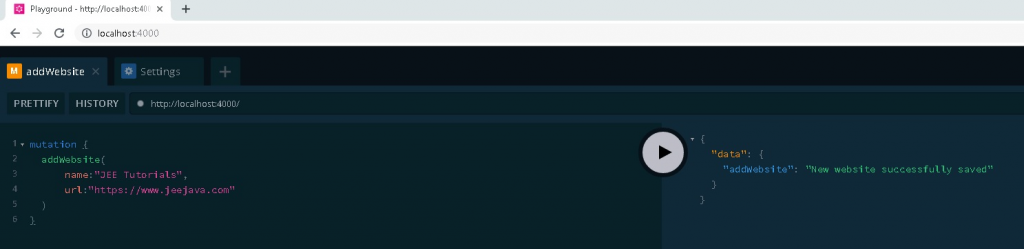
Creating Websites
Now we will add website information by executing below Mutation.
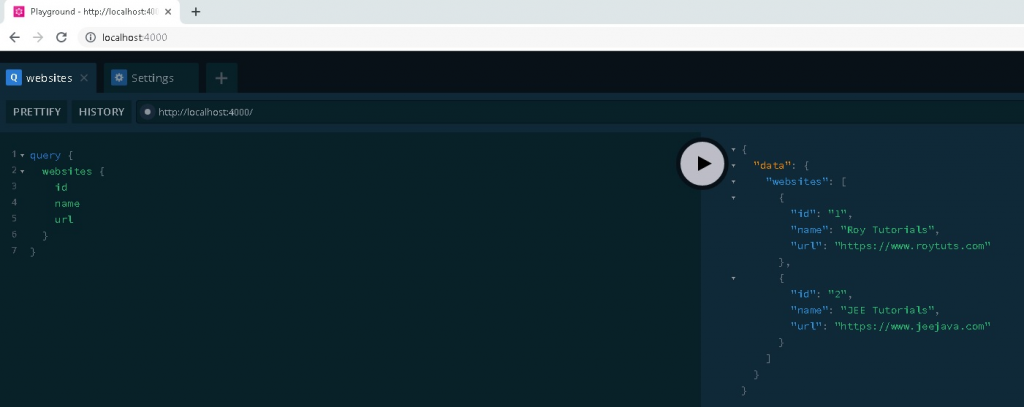
Reading Websites
Now you execute the same query we used previously to read website information.
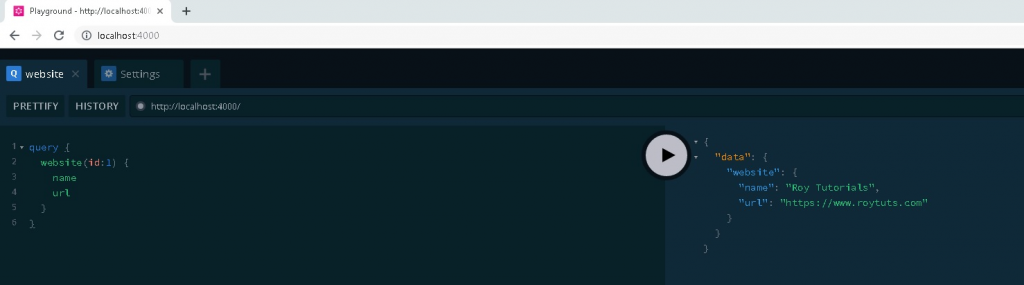
You can also query a particular website.
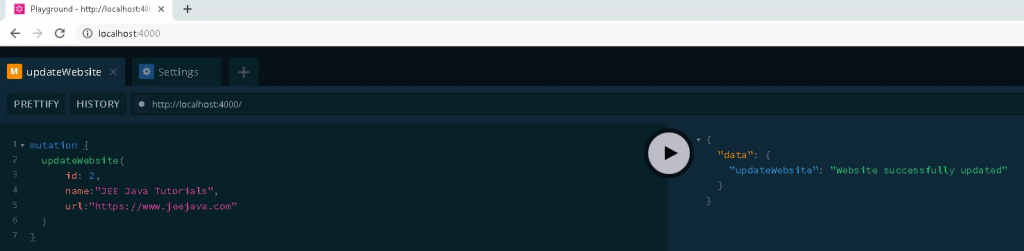
Updating Website
You can update existing website information.
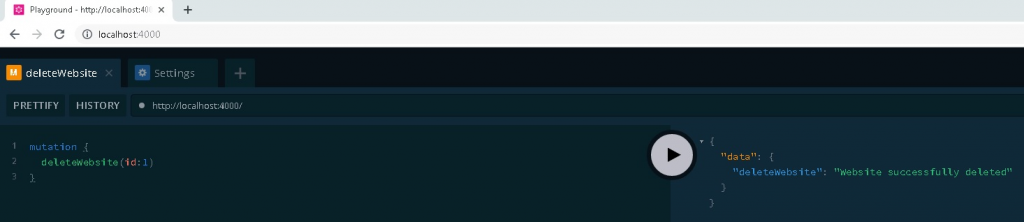
Deleting Website
You can delete an existing website.
Reading Website
Finally you will see below information after update and delete operations.

That’s all. Hope you got an idea how to wrap rest api with graphql in Node.js.
You may also like to read Wrap REST API with GraphQL in Spring Boot.
Source Code
Thanks for reading.