Dockerize MySQL Flask App
It is considered to be a best practice for a container to have only one process with single responsibility. But as I am going to dockerize Python based Flask web app and MySQL server for storing data for the app, so I need two containers – one for running the app and another one for running the MySQL database server.
So these two containers are running independently and to establish communication between these two containers you need docker compose. I am also going to show you how to install docker compose under Linux environment CentOS operating system.
Docker Compose is a tool for defining and running multi-container Docker applications. With Compose, you use a YAML file to configure your application’s services. Then, with a single command, you create and start all the services from your configuration.
Using Compose is basically a three-step process:
- Define your app’s environment with a Dockerfile so it can be reproduced anywhere.
- Define the services that make up your app in docker-compose.yml so they can be run together in an isolated environment.
- Run
docker-compose upand Compose starts and runs your entire app.
Prerequisites
Python 3.8.5/3.11.5, Flask 1.1.2/2.3.3, MySQL 8.0.21, Docker and Docker Compose (1.26.2/2.20.2) already installed
Docker Compose Installation
Use the following command to install Docker Compose in your system. I am installing it under Linux environment CentOS operating system.
I am using latest release version, you can check for the latest release version and also use.
$ sudo curl -L "https://github.com/docker/compose/releases/download/x.xx.x/docker-compose-$(uname -s)-$(uname -m)" -o /usr/local/bin/docker-composeIt may ask for password and you can enter for your user’s password.
Next set the permission to make the binary executable using the following command:
$ sudo chmod +x /usr/local/bin/docker-composeFinally verify that the installation was successful by checking the version using the following command.
For version 2.20.2, you need to use the following command:
$ docker compose versionIt will show you the following information:
Docker Compose version v2.20.2For version 1.26.2, you need to use the following command:
$ docker-compose --versionIt will show you the following information:
docker-compose version 1.26.2, build eefe0d31Flask MySQL App
I am going to create a simple Flask MySQL app. First create a project directory using the following command:
$ sudo mkdir python-flask-mysql-docker-composeNext go to the inside of the above directory and create two separate directories – app and db.
Now create an SQL file under db directory using command sudo vi user.sql and use the following content into it:
CREATE DATABASE roytuts;
use roytuts;

CREATE TABLE `user` (
  `id` int unsigned NOT NULL AUTO_INCREMENT,
  `name` varchar(50) NOT NULL,
  `email` varchar(100) NOT NULL,
  `phone` int unsigned NOT NULL,
  `address` varchar(250) NOT NULL,
  PRIMARY KEY (`id`)
) ENGINE=InnoDB AUTO_INCREMENT=7 DEFAULT CHARSET=utf8mb4 COLLATE=utf8mb4_unicode_ci;

insert  into `user`(`id`,`name`,`email`,`phone`,`address`) values
(1,'Soumitra Roy','sroy@gmail.com',2147483647,'Earth'),
(2,'Rahul Kumar','rahul@gmail.com',34256780,'Mars');
So I am done with the database and table creation under MySQL server.
Now I am going to create the required files for flask app under the app directory.
First you need to configure the flask instance and I am going to write the following code into app.py file.
from flask import Flask

app = Flask(__name__)
Next is to configure the database settings for establishing the communication between flask and database. So write the following code into db.py file.
from app import app
from flaskext.mysql import MySQL

mysql = MySQL()

# MySQL configurations
app.config['MYSQL_DATABASE_USER'] = 'root'
app.config['MYSQL_DATABASE_PASSWORD'] = 'root'
app.config['MYSQL_DATABASE_DB'] = 'roytuts'
app.config['MYSQL_DATABASE_HOST'] = 'db'
mysql.init_app(app)
Next you need to create the following code for fetching all users from the user table. The code is written into rest.py file. I am also starting the development server in debug mode to see any error during the application running.
import pymysql
from app import app
from db import mysql
from flask import jsonify

@app.route('/')
def users():
    conn = mysql.connect()

    cursor = conn.cursor(pymysql.cursors.DictCursor)
    cursor.execute("SELECT * FROM user")

    rows = cursor.fetchall()

    resp = jsonify(rows)
    resp.status_code = 200

    return resp

if __name__ == "__main__":
    app.run(debug=True,host='0.0.0.0')
You need to create a requirements.txt file for installing required softwares for your app. So you need two softwares – flask and pymysql. Flask is required as it is flask based application and pymysql & flask-mysql are required to connect to MySQL database from flask app. If you do not mention any version for a particular software then it will install the latest available package.
From MySQL version 8 you need cryptography package and you can find the reason SHA-256 Pluggable Authentication. If you do not install cryptography package then you will see an error during the runtime of your app – RuntimeError: ‘cryptography’ package is required for sha256_password or caching_sha2_password auth methods.
For Flask 2.x.x, use the following content:
cryptography
Flask==2.3.3
Flask-MySQL==1.5.2
PyMySQL==1.1.0
For Flask 1.x.x version use the following content:
cryptography
Flask==1.1.2
Flask-MySQL==1.5.1
PyMySQL==0.10.0
The important part of your app is to create a Dockerfile for building your application. You can learn on more about the content of Dockerfile in my tutorial on how to build, package and run the flask app with docker.
The line RUN apk add gcc musl-dev python3-dev libffi-dev openssl-dev is required to install the required package cryptography I have included into the requirements.txt file above.
FROM python:3.8.5-alpine or 3.11.5-alpine
COPY . /app
WORKDIR /app
RUN apk add gcc musl-dev python3-dev libffi-dev openssl-dev
RUN pip install -r requirements.txt
ENTRYPOINT ["python"]
CMD ["rest.py"]
Now the final part is to create docker compose file under the project’s root directory – python-flask-mysql-docker-compose. The docker compose file name is docker-compose.yml/yaml and the formatting must be consistent otherwise build will be failed. The version key is optional for Docker version 2 in the below docker-compose.yml file, so you can safely remove if you do not want to include.
version: "3"
services:
  app:
    build: ./app
    links:
      - db
    ports:
      - "5000:5000"

  db:
    image: mysql:8.0.21
    ports:
      - "30000:3306"
    environment:
      MYSQL_ROOT_PASSWORD: root
    volumes:
      - ./db:/docker-entrypoint-initdb.d/:ro
I am using two services, one is a container that exposes the REST API (app), and another one contains the database (db).
build: specifies the directory that contains the Dockerfile containing the instructions for building this service
links: links this service to another container. This will also allow you to use the name of the service instead of having to find the ip of the database container, and express a dependency which will determine the order of start up of the container
ports: mapping of ports from container to host so that this port can be exposed to the outside world for accessing the app URL.
image: similar to the FROM instruction in the Dockerfile. Instead of writing a new Dockerfile, I am using an existing image from a repository. It’s important to specify the version. If your installed mysql client is not of the same version problems may occur.
environment: add environment variables. The specified variable is required for this image, and as its name suggests, configures the password for the root user of MySQL in this container.
ports: since I already have a running mysql instance on my host using this port, I am mapping it to a different one. Notice that the mapping is only from host to container, so your app service container will still use port 3306 to connect to the database.
volumes: since I want the container to be initialized with a schema, I wire the directory containing user.sql script to the entry point for this container. It is the image specification that runs all .sql scripts in the given directory.
Running the Flask MySQL App
Now let’s run the dockerized app by executing the following command:
For Docker 2.xx.x, you need to use the following command:
$ docker compose upFor version 1.xx.x, you need to use the following command:
$ docker-compose upYou will see finally your app is running on port 5000. You will also notice that two containers are created – one for MySQL server and another one for flask app.
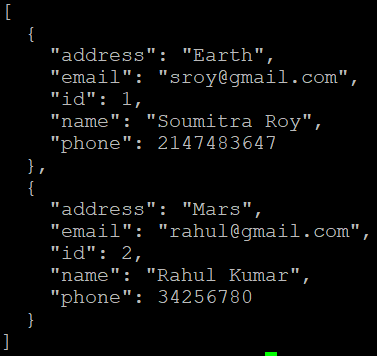
Now to see the output of the REST API, type the command curl http://localhost:5000/ on your Unix shell terminal. You will see the following output on your Unix terminal:
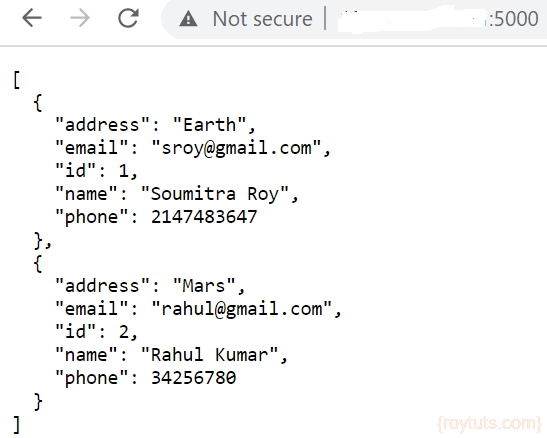
Or even you can access the URL via web browser by your server IP address on port 5000, http://<IP Address>:5000/ and you will get the following outptu:
That’s all. Hope you got idea on docker compose and how to dockerize multiple containers.