Introduction
We will see an example here how to publish and subscribe message onto MQTT (Mosquitto) using Spring Boot framework. We had seen in our previous example how to publish and subscribe message using Mosquitto client – MQTT.fx. So here we are going to ingrate Spring application with MQTT broker through Spring integration framework, though the style of programming is not a typical Spring integration programming.
We have discussed what is Mosquitto (MQTT broker) or how it is useful in introduction section of the tutorial where I had shown how to install Mosquitto server on Windows environment.
We have also discusses about QoS (Quality of Service) in QoS section of the tutorial where I had shown how to publish and subscribe message using MQTT.fx tool.
We will also see here how MQTT.fx client tool receives message from MQTT broker once message is published to the broker using Spring Boot application.
Prerequisites
Eclipse 4.9.0, Java 1.8, Gradle 4.10.2, Spring Boot 2.1.8, Mosquitto
Project Configuration
In order to create Spring Boot application we need to first setup a project in Eclipse. We will create a gradle based project here and the project name is spring-integration-mqtt-publisher-subscriber.
Build Script
We need to add the required dependency for Spring Boot and MQTT broker (Eclipse Paho library).
buildscript {
	ext {
		springBootVersion = '2.1.8.RELEASE'
	}

    repositories {
    	mavenLocal()
    	mavenCentral()
    }

    dependencies {
    	classpath("org.springframework.boot:spring-boot-gradle-plugin:${springBootVersion}")
    }
}

apply plugin: 'java'
apply plugin: 'org.springframework.boot'

sourceCompatibility = 8
targetCompatibility = 8

repositories {
	mavenLocal()
    mavenCentral()
}

dependencies {
	implementation("org.springframework.boot:spring-boot-starter:${springBootVersion}")
	implementation('org.springframework.integration:spring-integration-mqtt:5.2.0.RELEASE')
}
MQTT Client Configuration
In order to send to and/or receive messages from MQTT broker, the first thing is to obtain an implementation of the IMqttClient interface.
This interface contains all methods required by an application in order to establish a connection to the server, send and receive messages.
Eclipse paho library provides two implementations of the IMqttClient interface, an asynchronous – MqttAsyncClient and a synchronous – MqttClient.
For our example we will focus on synchronous one – MqttClient.
Creating MqttClient Instance
The following code snippets show how to create MqttClient instance.
This is using a simple constructor from the library and it takes endpoint address of the broker and client identifier.
IMqttClient mqttClient = new MqttClient("tcp://" + hostname + ":" + port, clientId);We will use the computer name as a client identifier.
Connecting to MQTT Server
The above code snippet only creates an instance of the MqttClient class but it does not connect to the server. So we need to call connect() method for connecting to the server by passing optional connection parameters.
mqttClient.connect(mqttConnectOptions());The complete source code in a method for connecting to the MQTT server is given below:
@Bean
public IMqttClient mqttClient(@Value("${mqtt.clientId}") String clientId,
		@Value("${mqtt.hostname}") String hostname, @Value("${mqtt.port}") int port) throws MqttException {

	IMqttClient mqttClient = new MqttClient("tcp://" + hostname + ":" + port, clientId);

	mqttClient.connect(mqttConnectOptions());

	return mqttClient;
}
Connection Parameters Configurations
Connection parameters are configured through a bean as shown below:
@Bean
@ConfigurationProperties(prefix = "mqtt")
public MqttConnectOptions mqttConnectOptions() {
	return new MqttConnectOptions();
}
Connection Parameters
The above bean uses parameters from application.properties file which is under src/main/resources folder.
The MqttConnectOptions bean uses the following parameters and notice how I have configured it using @ConfigurationProperties annotation with prefix = "mqtt".
The MqttConnectOptions maps only the required parameters which match with its attributes. Rest of the parameters are used to create MqttClient instance above as shown in the Connecting to MQTT Server section.
mqtt.automaticReconnect=true
mqtt.cleanSession=true
mqtt.connectionTimeout=10
mqtt.clientId=${COMPUTERNAME}-MQTT
mqtt.hostname=127.0.0.1
mqtt.port=1883
Publishing and Receiving Messages
Now we will see how to publish message to a topic and subscribe to a topic. We will subscribe to a topic and get the message and return the response.
Publishing Message
Publishing message to the MQTT broker using MqttClient instance is straight forward.
We can use one of the publish() method variants to publish message. You can see one variant is commented in the following code snippets.
You need to send some parameters as shown in the below method.
First parameter is the name of the topic, second parameter is message or payload you want to publish to the topic, third parameter is QoS (Quality of Service), fourth parameter is flag to the broker and it indicates whether you want to retain the message or not until subscriber consumes the message.
Here I have called disconnect method once message publishing is done. Ideally you may not want to disconnect from the server.
public void publish(final String topic, final String payload, int qos, boolean retained)
		throws MqttPersistenceException, MqttException {
	MqttMessage mqttMessage = new MqttMessage();
	mqttMessage.setPayload(payload.getBytes());
	mqttMessage.setQos(qos);
	mqttMessage.setRetained(retained);

	mqttClient.publish(topic, mqttMessage);

	//mqttClient.publish(topic, payload.getBytes(), qos, retained);

	mqttClient.disconnect();
}
Receiving Message
In order to receive messages from the MQTT broker, we need to use one of the subscribe() method variants.
In the following method we have shown how to add a message listener to an existing MqttClient instance to receive messages from a given topic.
The subscribe() method used below takes an IMqttMessageListener instance as its second argument.
public void subscribe(final String topic) throws MqttException, InterruptedException {
	System.out.println("Messages received:");

	mqttClient.subscribeWithResponse(topic, (tpic, msg) -> {
		System.out.println(msg.getId() + " -> " + new String(msg.getPayload()));
	});
}
Creating Main Class
As we know main class with annotation @SpringBootApplication and main method is enough to run the application. Here we are creating Spring Boot standalone project and run using commandline runner.
So in the run() method we call the above publish() and subsribe() methods as shown below:
@Override
public void run(String... args) throws Exception {
	final String topic = "roytuts/topic/event";

	messagingService.subscribe(topic);

	messagingService.publish(topic, "Hi\nThis is a sample message published to topic roytuts/topic/event", 0, true);

	context.close();
}
Finally we close the context and terminate the application.
Testing the Application
Run the main class, your application will publish the message to the broker through topic and subscriber will receive the message.
Console Output
On Eclipse console you will see the below message which is received by the subscriber:
Messages received:
0 -> Hi
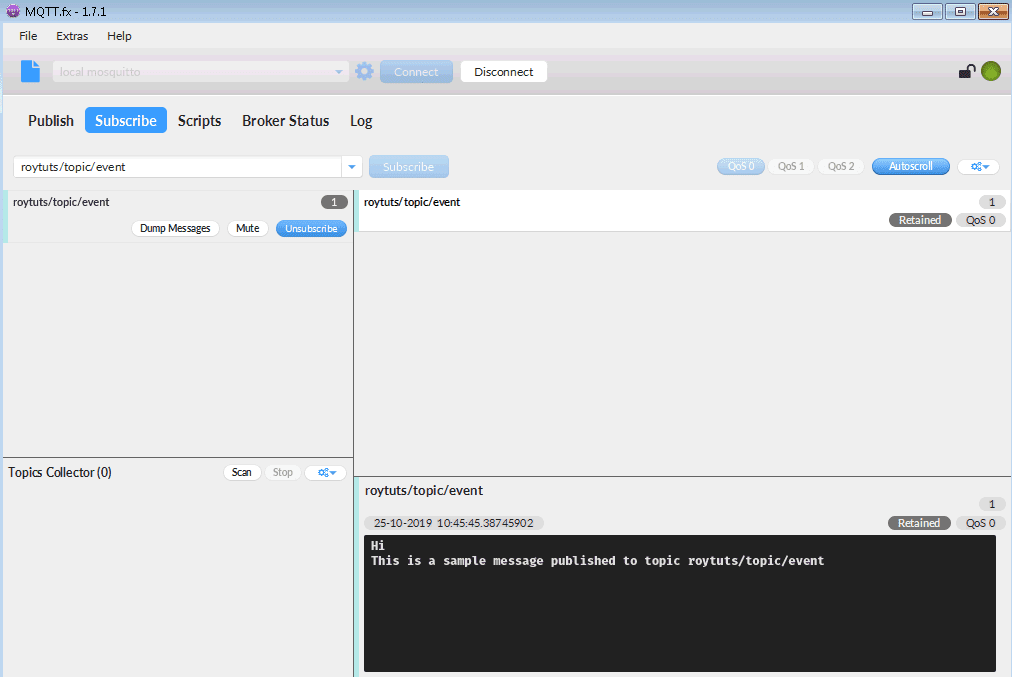
This is a sample message published to topic roytuts/topic/eventUsing MQTT Client
Using MQTT client – MQTT.fx tool, you will also receive the same message as shown below in the image:
That’s all. Hope you got an idea on how to publish subscribe message onto MQTT using Spring Boot.
Source Code
Thanks for reading.