Introduction
In this tutorial I am going to explain about few common startup problems or errors of RabbitMQ server after a fresh installation. I am using 3.6.1 version of the RabbitMQ message broker.
RabbitMQ Startup Errors
You might have faced the following errors during starting the RabbitMQ message broker after installation in your system.
- Starting broker… completed with 0 plugins.
- C:/Users/username/AppData/Roaming/RabbitMQ/rabbitmq.config (not found)
- Closing AMQP connection <0.292.0> (127.0.0.1:57501 -> 127.0.0.1:5672): {bad_header,<<“GET / HT”>>}
- On hitting http://localhost:15672 in browser: This site can’t be reached
Now the above errors are related and can be solved gracefully by looking at the error message. The 2nd and 3rd errors can be found in the log file. The 3rd error generally occurs when you try to access the management console of RabbitMQ broker by accessing the URL http://localhost:15672 in the browser (4th error message is shown in the browser).
The main reason for 3rd and 4th errors is the 1st message which gets displayed when you try to start your RabbitMQ broker by executing the rabbitmq-server.bat file which is located under C:\Program Files\RabbitMQ Server\rabbitmq_server-<version>\sbin folder.

The 2nd error is found in the log file of the RabbitMQ server. The log file is generally created under C:/Users/username/AppData/Roaming/RabbitMQ/log folder.
Solutions
Now I will tell you how to solve these errors found during RabbitMQ startup.
The 2nd error rabbitmq.config file not found can be fixed easily by putting the config file under the C:/Users/username/AppData/Roaming/RabbitMQ/ folder.
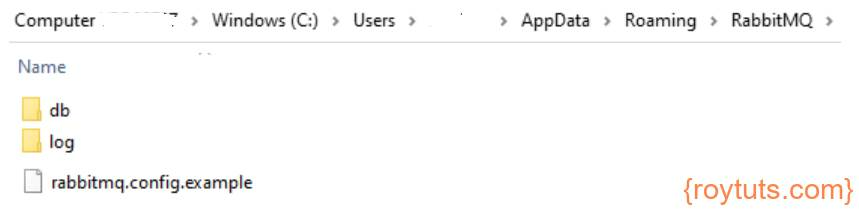
If you check the folder C:/Users/username/AppData/Roaming/RabbitMQ/, then you will find that a sample config file (rabbitmq.config.example) exists:
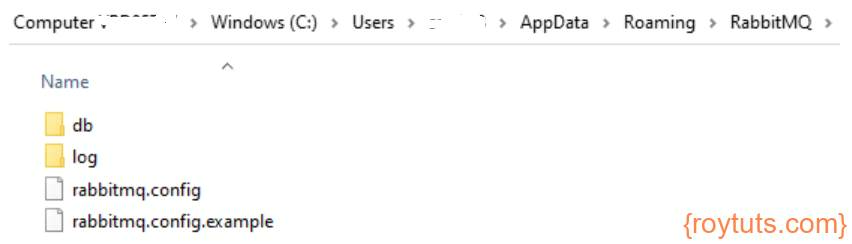
So, you can copy and rename the same example config file to rabbitmq.config to create the config file in the same location as shown in the below image:
Now next time when you start your RabbitMQ message broker, you won’t find the rabbitmq.config (not found) error in the log file. So, your 2nd error got solved.
Now your 3rd and 4th errors what you get since your management console was not enabled and to enable management console, you need to enable management plugins. And this is the reason when you started your RabbitMQ broker you saw the message “Starting broker… completed with 0 plugins.”
The 4th error you get in the browser because you are trying to access port 5672 which is an AMQP port which gets mapped to HTTP port 15672 through management console. So, once management console is enabled then you can access it through browser.
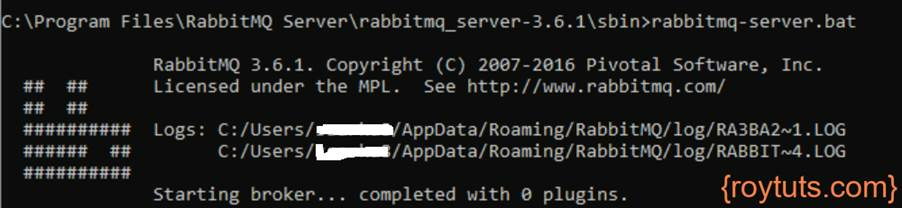
Let’s enable management console by executing the command rabbitmq-plugins.bat enable rabbitmq_management on the same path where you execute the rabbitmq-server.bat file.

In the above output, you see several plugins have been enabled.
In the log file, you will also find the similar output for plugins enablement and at which ports RabbitMQ server listens to:
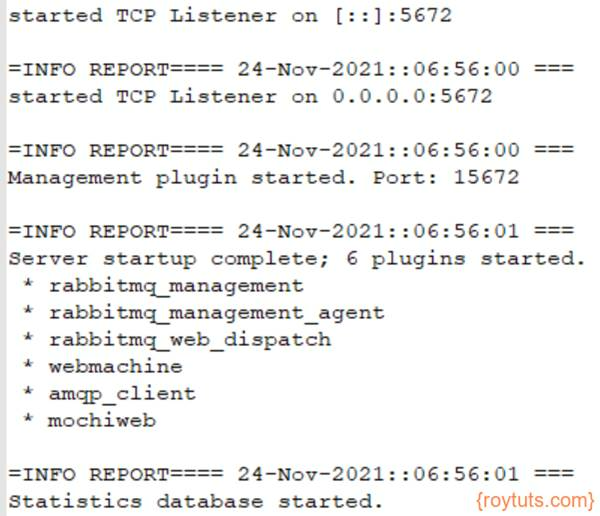
Finally, when you start the RabbitMQ broker, you will find that several plugins have been started during broker start:
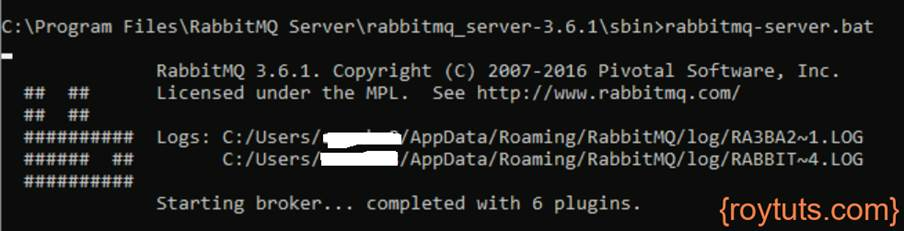
Note that the manual enablement of the RabbitMQ management console is required only for the first time.
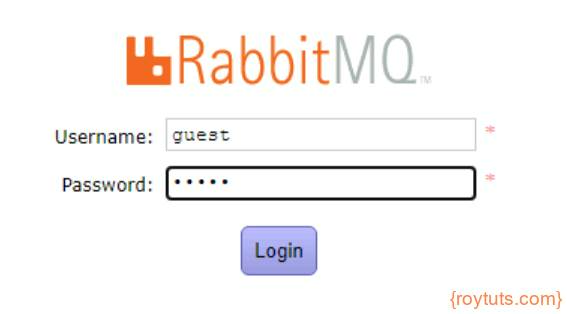
Now when you try to access the management console of RabbitMQ message broker by accessing the URL http://localhost:15672 in the browser, you will see the login page:

You can use the default credentials guest/guest as username/password to login to the management console.
Once you are successfully logged into the management console, you will find configuration details on your home page or dashboard:
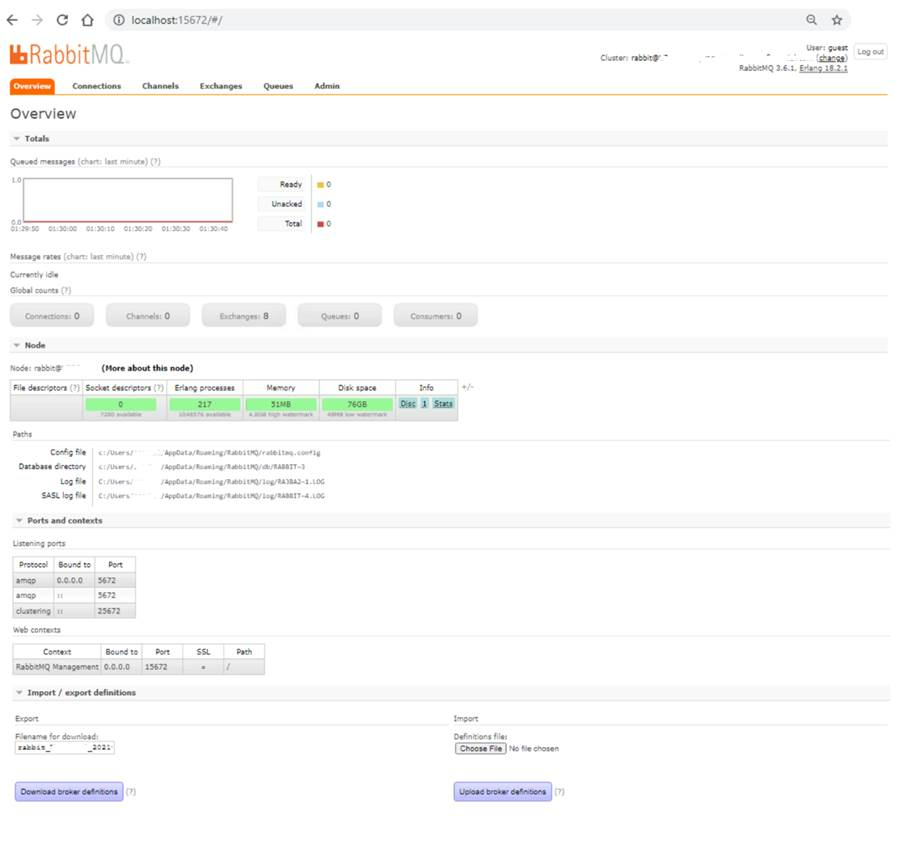
You will see memory space, disk space in the dashboard. You will also see different locations of files, such as, log file, config file, etc. The host and ports for AMQP and management console are also listed in this page.
That’s all about how to fix RabbitMQ common starting errors.